Conservation of a 15th Century Manuscript on the Life of St. Augustine
By Mary Hamilton French, Associate Book Conservator, 2021
INTRODUCTION
The Boston Public Library (BPL) is home to many cultural treasures, and NEDCC has frequently worked with the BPL for the past several decades to conserve and digitize items from their collections. In 2019, the BPL brought a 15th century manuscript on the Life of St. Augustine to NEDCC for treatment and imaging. Funding for the project was underwritten by the Associates of the Boston Public Library.
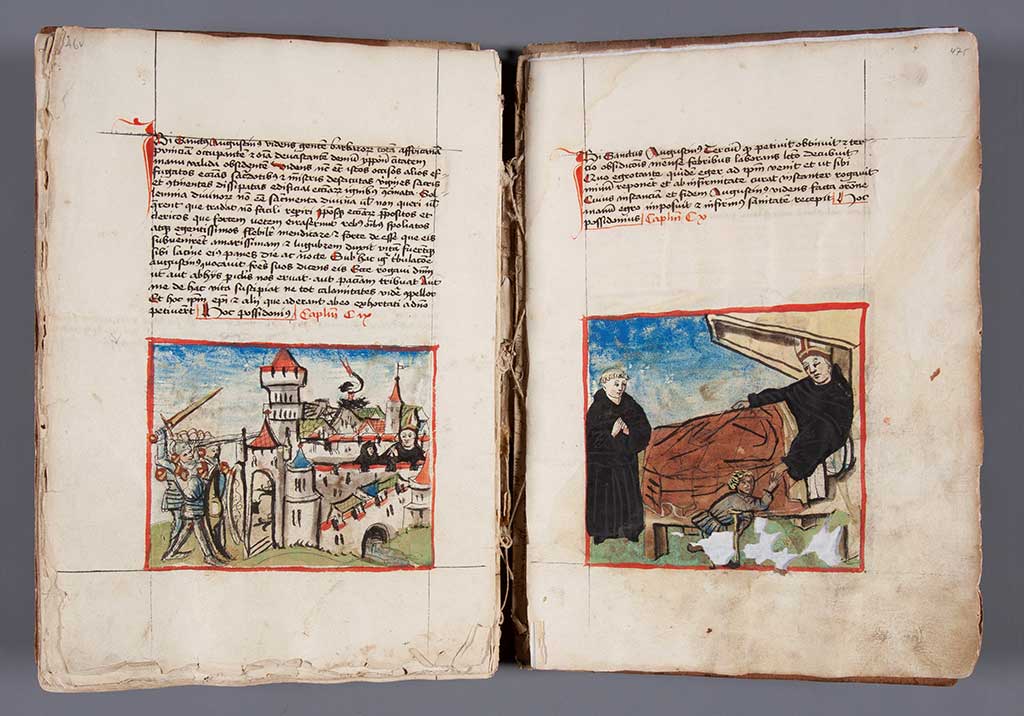
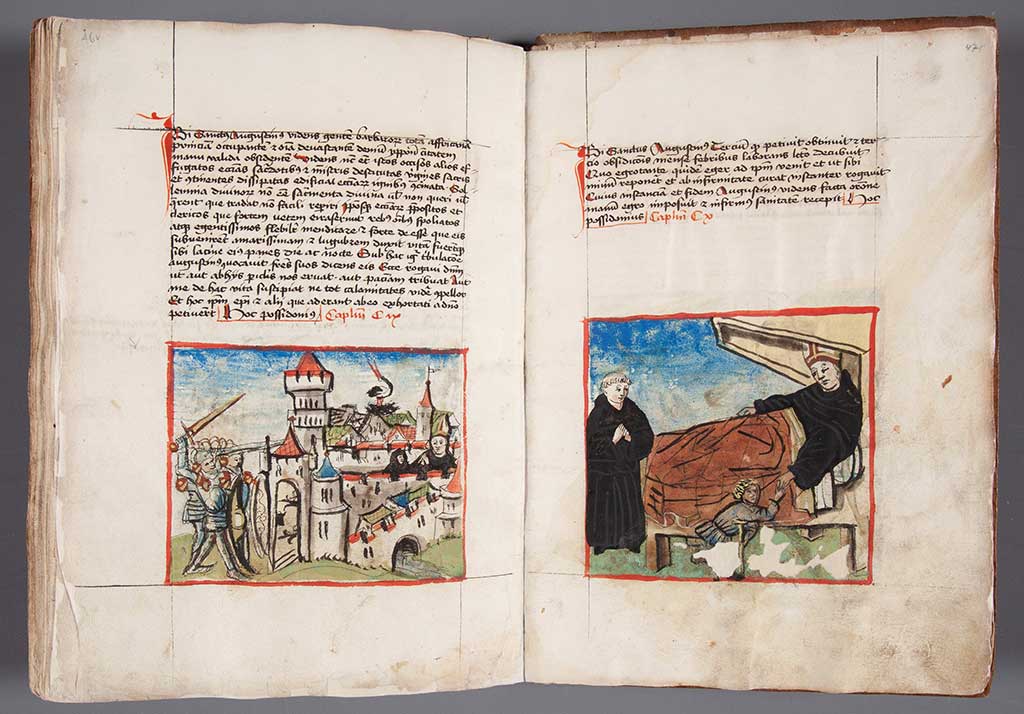
As the most extensively-illustrated Vitae Augustini still in existence, this manuscript is important to scholars and researchers because it contains many stories and anecdotes of St. Augustine’s life not found elsewhere in any other recorded literature. Due to the extensive use of a corrosive copper-based pigment throughout the volume, the paper underneath many of the illustrations was cracked and fragmentary. As such, the volume was at significant risk of damage, even with the gentlest use, and could no longer be safely accessed by readers making conservation an immediate priority.
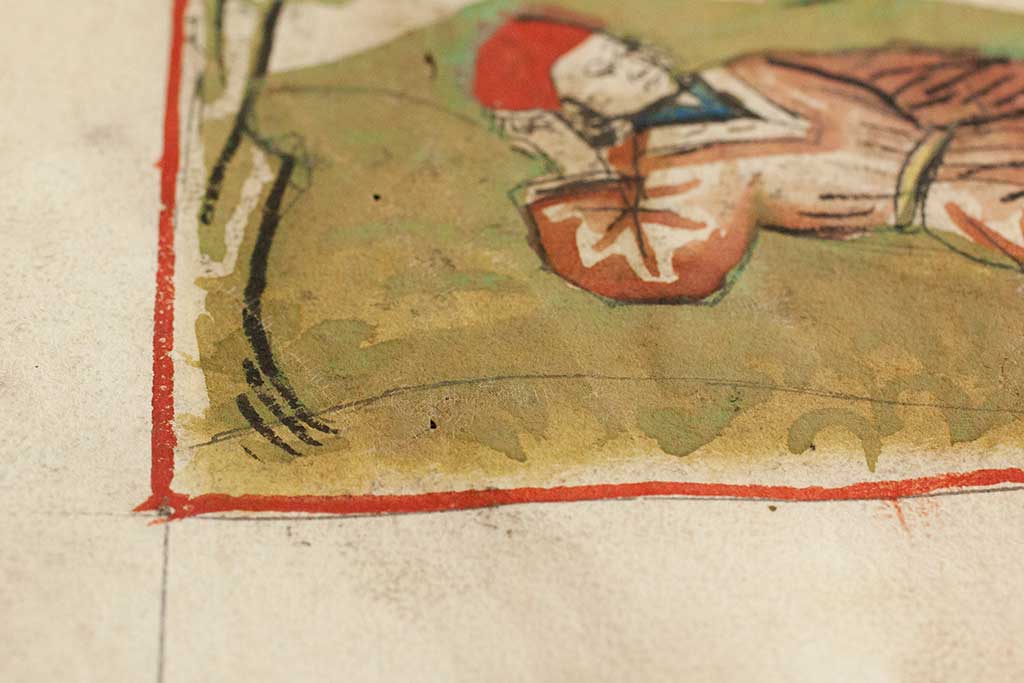
 The paper under many of the miniatures was cracked and some areas sustained significant losses
(Click on any image to view as a slideshow.)
The need to repair these cracked pages was complicated by the fact that copper-based pigments are notoriously reactive, and the areas of the pages needing repair were almost always underneath the beautiful, hand-drawn illustrations. An ideal treatment plan would neither cause long-term damage to the copper media nor negatively impact the aesthetic experience of future readers and scholars. In addition, the manuscript was very unusual in that it was still bound in a binding nearly as old as the text, and both had never been conserved or altered with the exception of one or two historic paper repairs. In order to preserve as much historic binding evidence as possible, conservation treatments to the binding and text block needed to be fairly minimal and focus on stabilization rather than a more interventive approach.
THE LIFE OF ST. AUGUSTINE
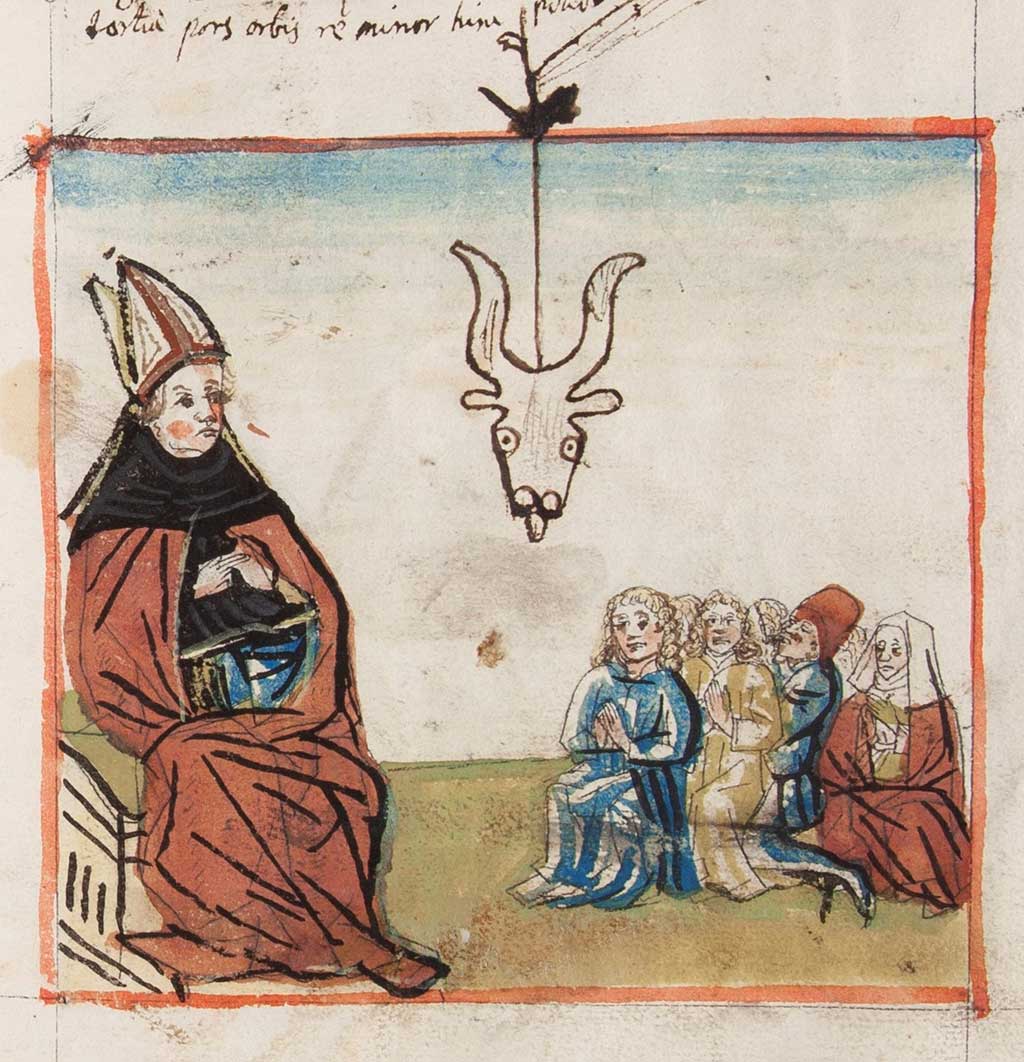 The paper had bull’s head watermarks, shown here outlined in ink by an unknown vandal
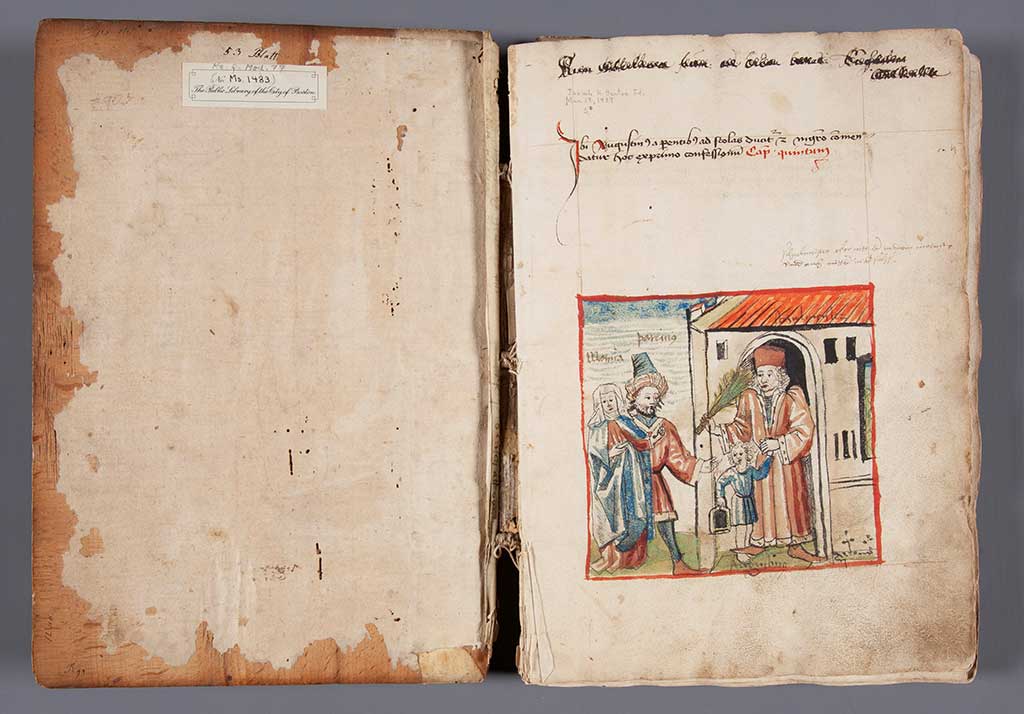
The manuscript likely originated in Speyer, Germany based on the characteristic bull’s head watermark found in the paper. The text has been dated to between 1470-1485 and the binding was created approximately 10-20 years afterwards. The printer’s waste pastedown on the back board indicates that the binding was likely completed around 1494, as the leaf is from a known incunable printed in that year.
 The printer’s waste pastedown on the back board is folio s3 of the Freiburg 1494 edition of Augustine's City of God, which helps date the binding
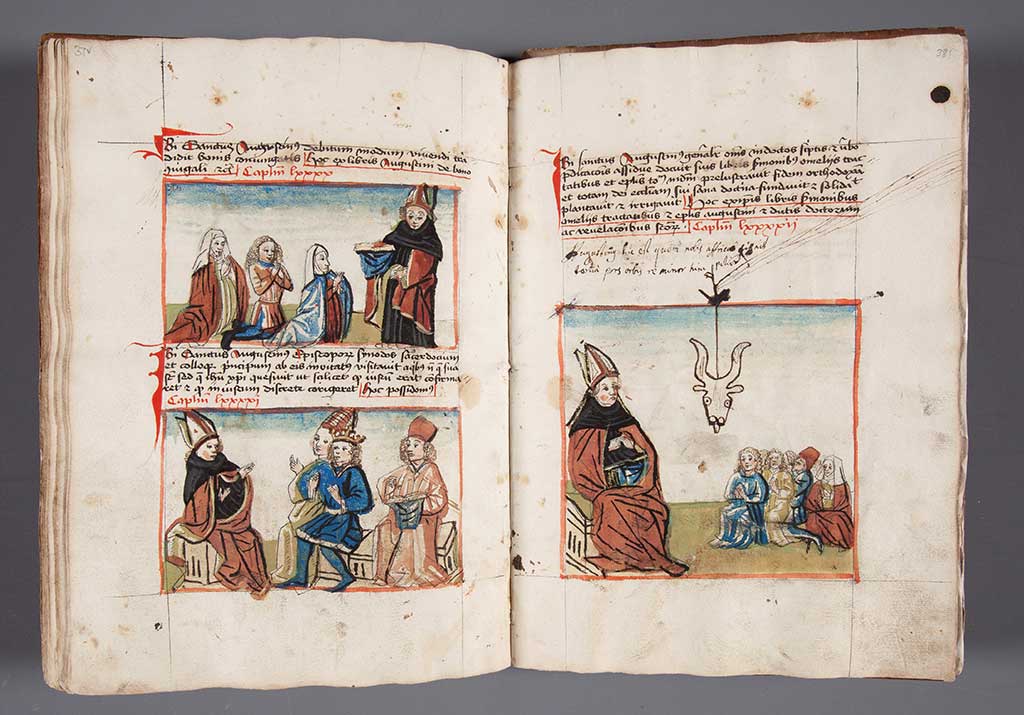
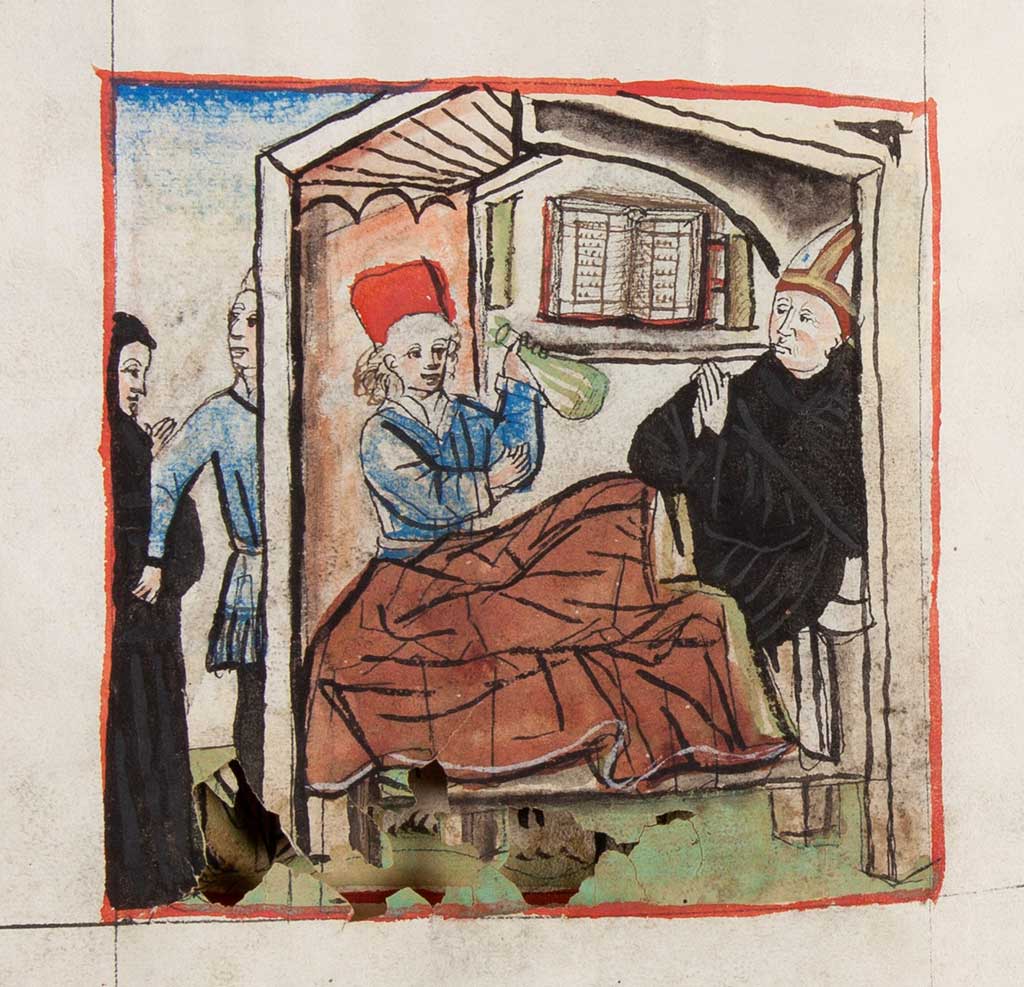
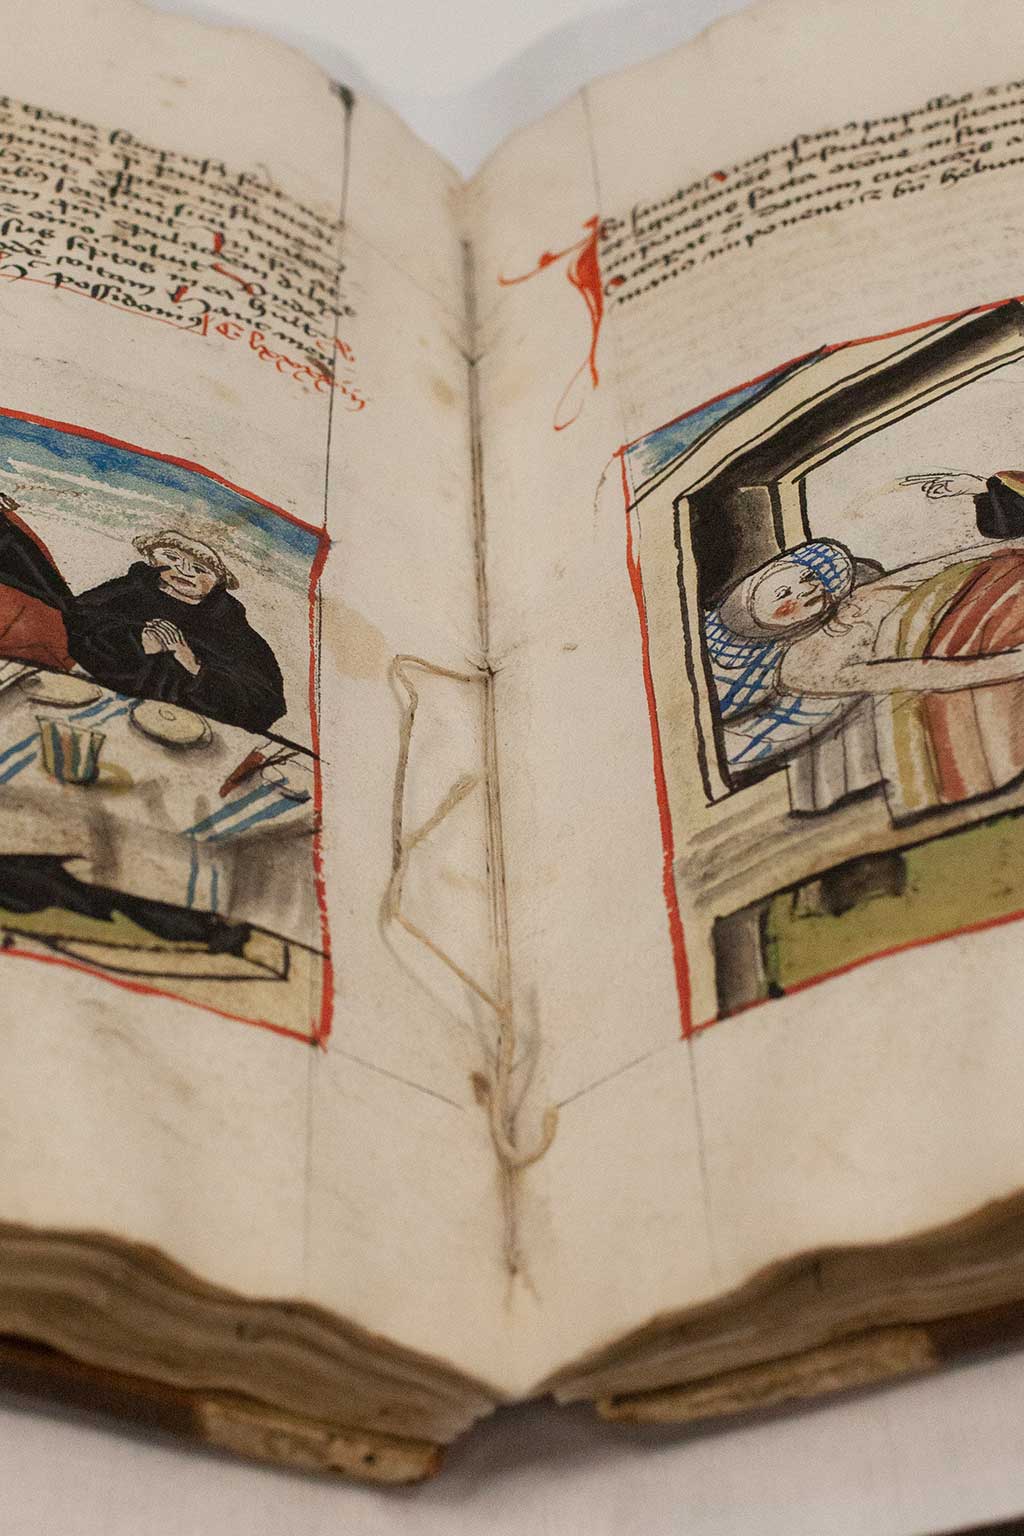
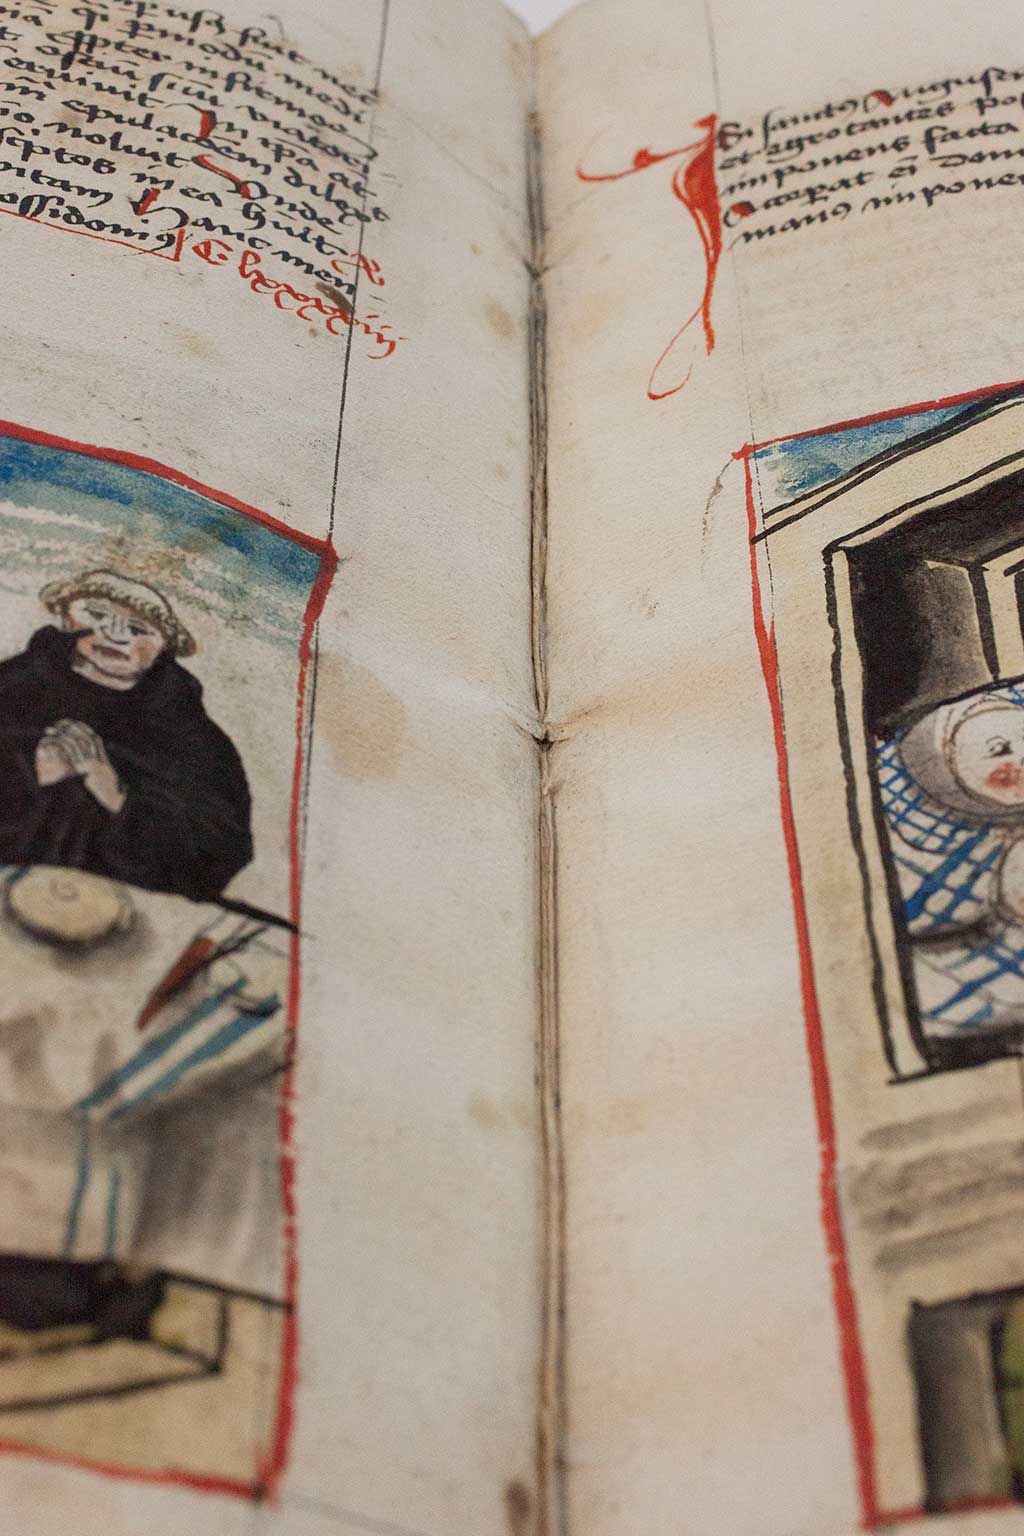
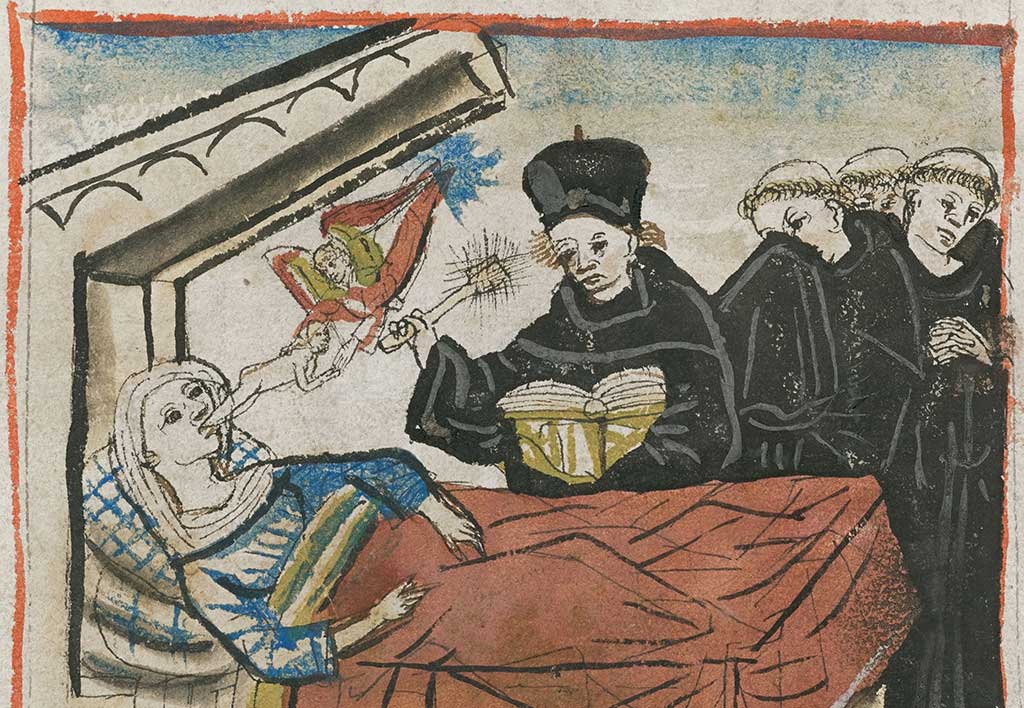
The text is the most complete Augustinian iconography known to exist, containing 116 hand-inked miniatures. The manuscript is not quite complete; chapters 1-4 and 22-25 are missing, although the loss of these chapters seems to have occurred before the text was bound. The narrative is by no means comprehensive and most text accompanying the miniatures is brief. Rather than forming a fully-fleshed out story, the text serves as a short description of the depicted scene. Originally owned by the Order of the Hermit Friars of St. Augustine, the manuscript was almost certainly created by one of its members. The Order was well-known for elaborating previously-existing stories in the life of St. Augustine, and this may explain why the manuscript contains a number of scenes from the Saint’s life that are not found in other accounts.
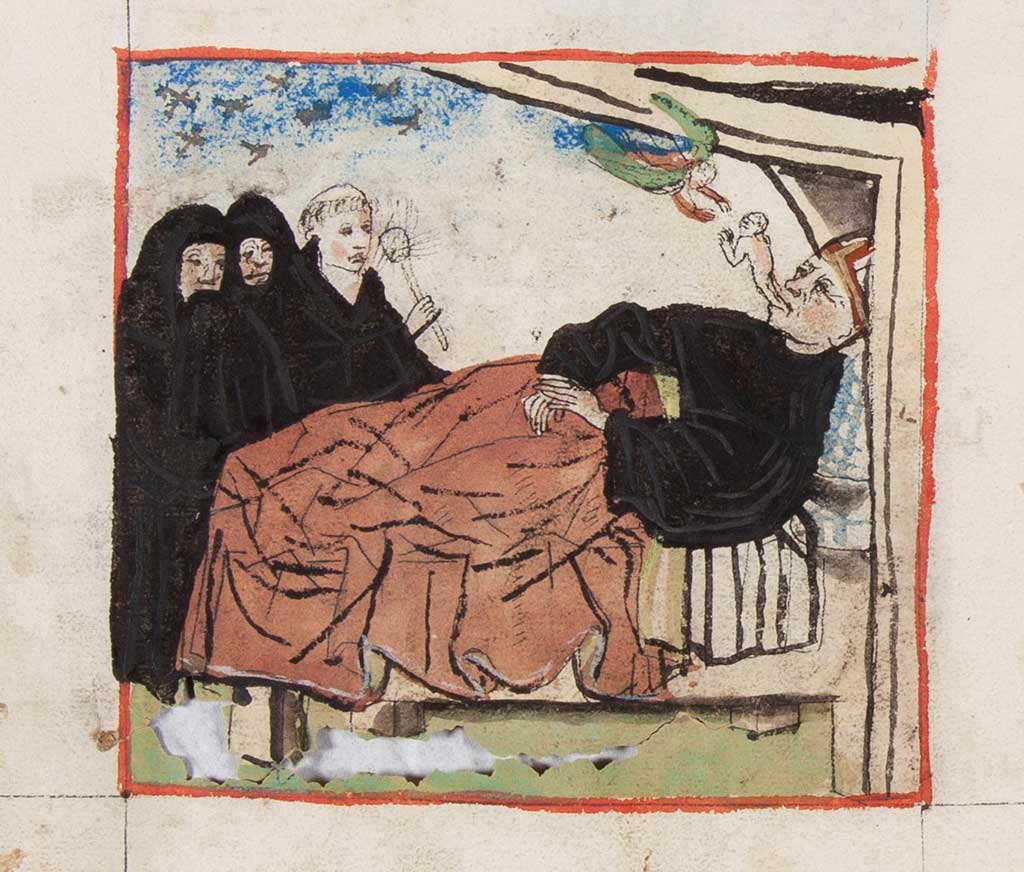
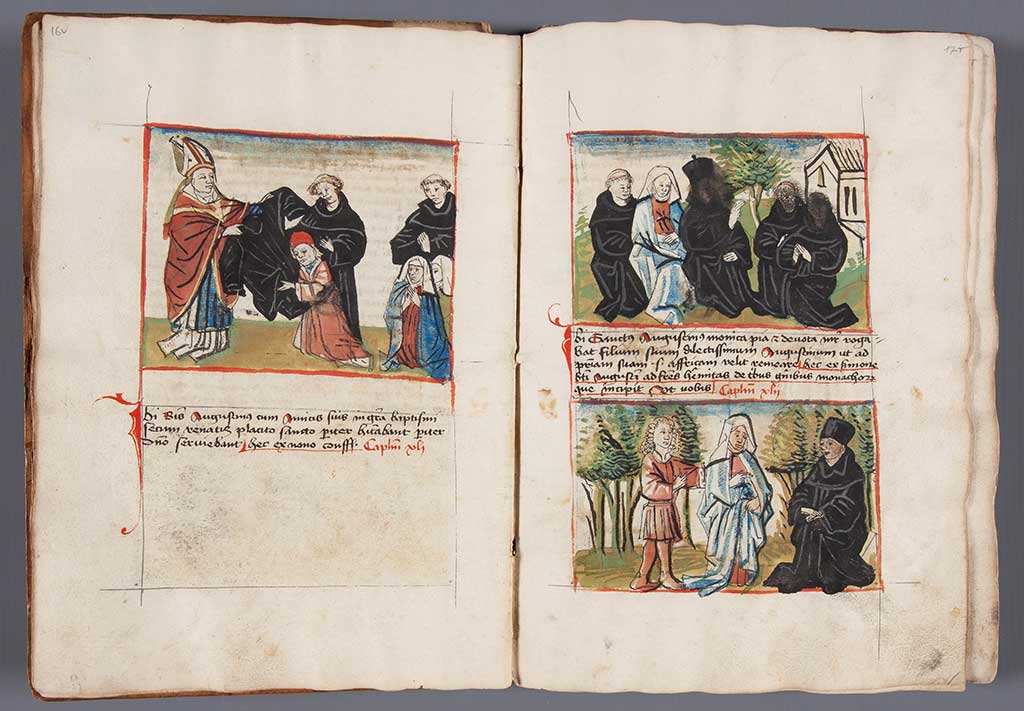 Some of the priests’ faces were obscured by black ink throughout the volume, although it is not known why
BINDING AND TEXT BLOCK CONDITION
 The 15th century binding was largely intact and had never previously been conserved or restored
Upon receipt at NEDCC, the binding was relatively intact, considering its age, and had not been rebound or treated previously. The volume was bound in a quarter alum tawed pigskin over wooden boards binding. The alum tawed skin was blind tooled with floral lozenges in diamond and club shapes. There were losses in the spine material at the head and tail, as well as over the raised cords. There was also some insect damage to the boards although luckily this was inactive. At one point, the binding had a single clasp at the fore edge, but this was missing. The text block was sewn on three double cords with lightly packed sewing. Pastedowns and board attachments consisted of multiple layers of parchment manuscript and paper printers’ waste. The board attachments were very secure and so the binding was still in one piece.
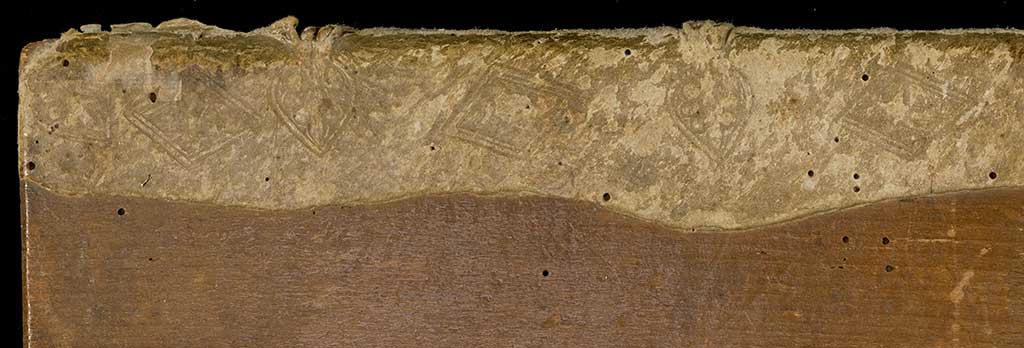 The binding’s alum tawed skin was tooled with floral lozenges in diamond and club shapes
The text block consisted of 5 sections of handmade paper bifolia sewn through the fold onto double raised cords. The text was written in black ink Gothic cursive with vermillion rubrication. The illustrations, although plentiful, were fairly rudimentary and there was almost no gold illumination. Executed in simple color blocks of red, blue, yellow, black, green, and ocher, the drawings are charming, lively, and humorous. The manuscript is characteristic of those produced after the popularization of the moveable-type printing press. Instead of parchment, the manuscript is executed on paper; cursive script is used rather than a formal book hand; and there are rough pen and ink drawings, not intricately illuminated miniatures.
The manuscript was written, illustrated, and bound after the introduction of the moveable-type printing press, and demonstrates a shift in book production styles
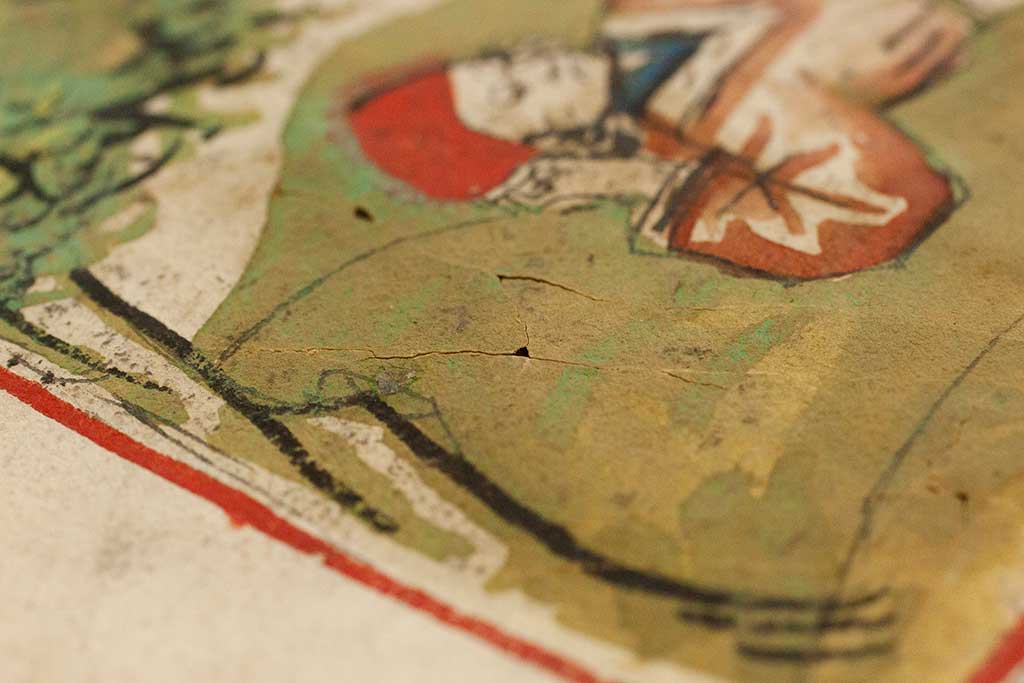
The primary point of concern prior to treatment was the extensive fracturing of the paper underneath many of the illustrations. This fracturing was presumed to be due to copper ink corrosion since it only occurred in areas containing green pigments, and was particularly prevalent in areas where the green pigment was found on both recto and verso. The fracturing made the leaves very delicate and difficult to handle safely, and there were large losses in some heavily-affected areas. Even turning the pages carefully, it was observed that the fractured areas were flexing and the edges were abrading each other, so mechanical damage was occurring with every single use. If left untreated the manuscript would immediately have significant handling restrictions implemented to avoid further damage.
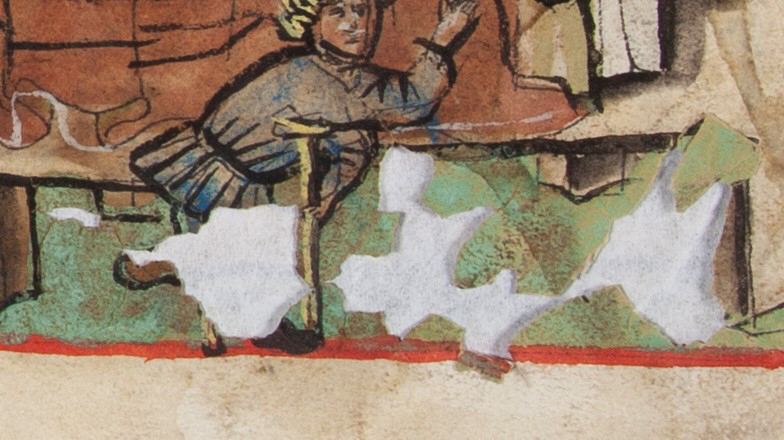
Some pages were interleaved with white tissue paper (the white paper shown underneath the losses above) to prevent the jagged edges from catching on each other and causing further damage during use
Conservation was therefore necessary, but the type and location of the media made treatment difficult to do safely. Moisture, heat, light, acids, and bases accelerate corrosion in copper-based pigments so the repair method needed to minimize the use of materials that include these agents of deterioration. Increased corrosion would further embrittle and damage the paper underneath the copper media, and would eventually lead to more cracking and loss in the illustrations. The aesthetics of the repairs were also a consideration, since all of the fractures ran through the illustrations. Because the illustrations were on both recto and verso, the cracks in the paper could not be subtly repaired from behind.
 |
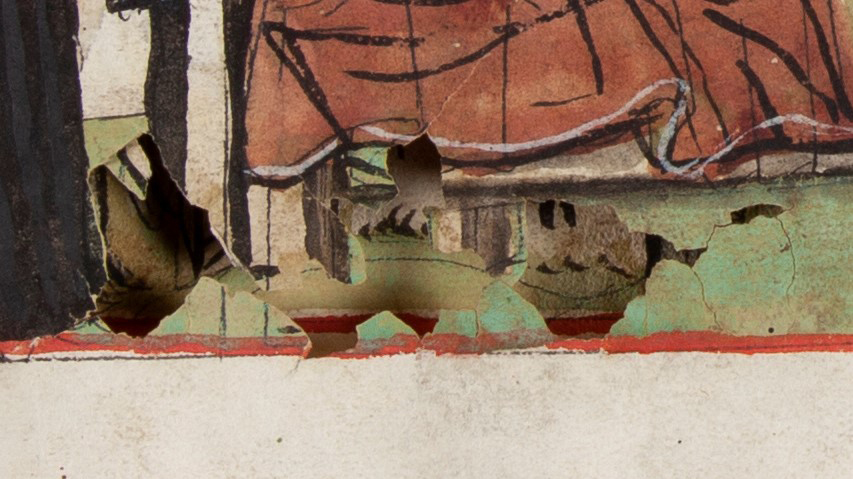 |
This loss, shown above on both recto (left) and verso (right), illustrates the difficulty of repairing damage in areas containing media on both sides of the page
The binding was holding together fairly well, and this was largely due to the secure board attachments, unbroken sewing supports, and intact sewing around the raised double cords. However, the sewing was largely broken inside the text block and some sections were loose. The loose sections had enlarged or torn sewing stations, and many were split or partially split along the spine fold due to mechanical wear. During use, the sections were prone to sawing against the thread, so it was clear that the text block needed to either be resewn or have the sewing strengthened to prevent further damage. Resewing would have meant disbinding the volume, but disbinding would destroy historical evidence contained in the sewing and binding structure. Instead, it was decided to reinforce the existing sewing to help stabilize the sections without removing the previous thread or disturbing the binding.
The sewing, which was intact around the raised double cords and broken within the text block, had torn through the paper along the spine folds
CONSERVATION
Surface Cleaning and Consolidation
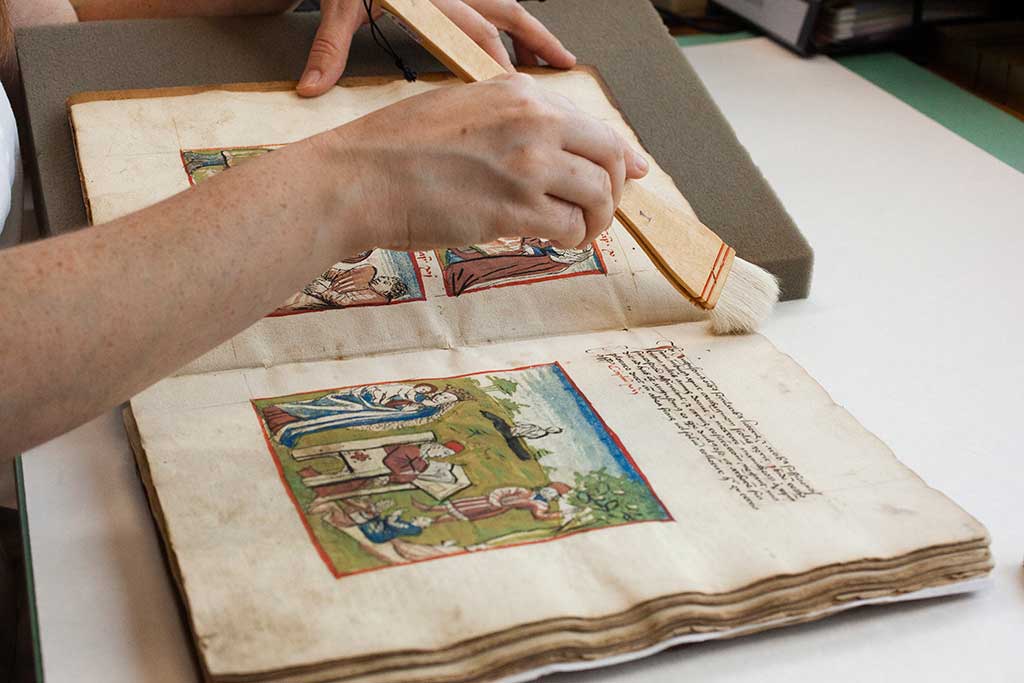 Surface cleaning the text block with a soft brush
After photographing the volume prior to treatment and carefully documenting its condition, the text block was surface cleaned only in areas containing no media. Any loose material – dirt, feather pen trimmings, and so on – was reserved. The surface dirt was, for the most part, heavily ingrained and so cleaning did not appear to make much of a difference. The media was tested for friability; while most of the media was fairly stable, the carbon black pigmented areas were friable. There were cracks in the heavily-pigmented areas, and some of the black media was flaking away. These areas were consolidated with ethanol and TRI-Funori, a gentle adhesive derived from seaweed. This consolidant was selected because it has a matte appearance when dry and so would not negatively affect the matte appearance of carbon-based media.
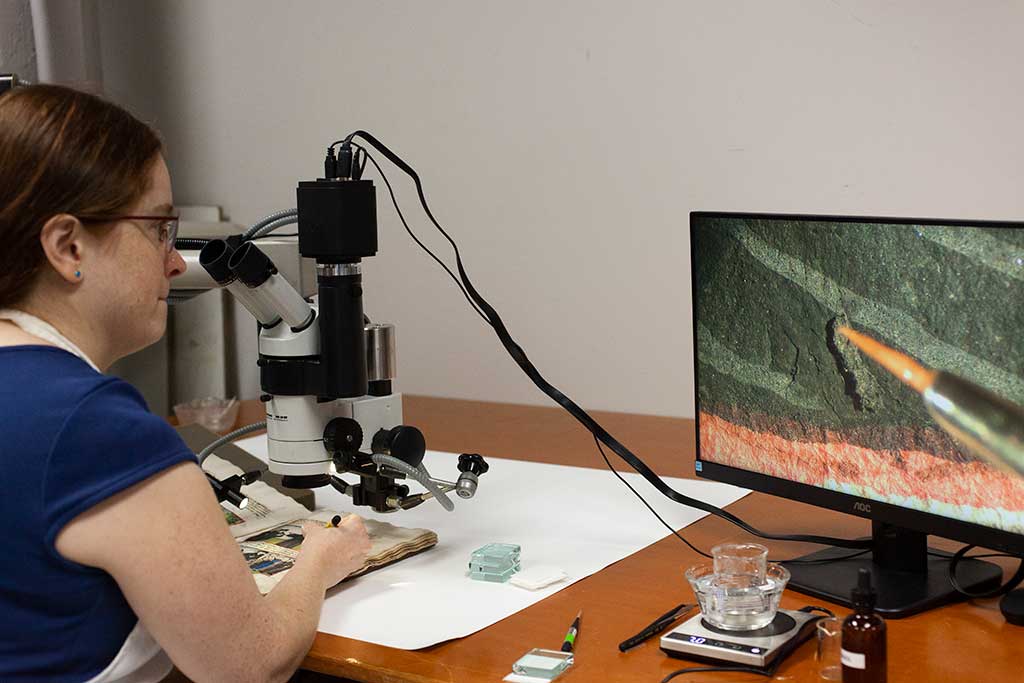 Consolidating friable media under a microscope
Fine Fiber Stitch Repairs
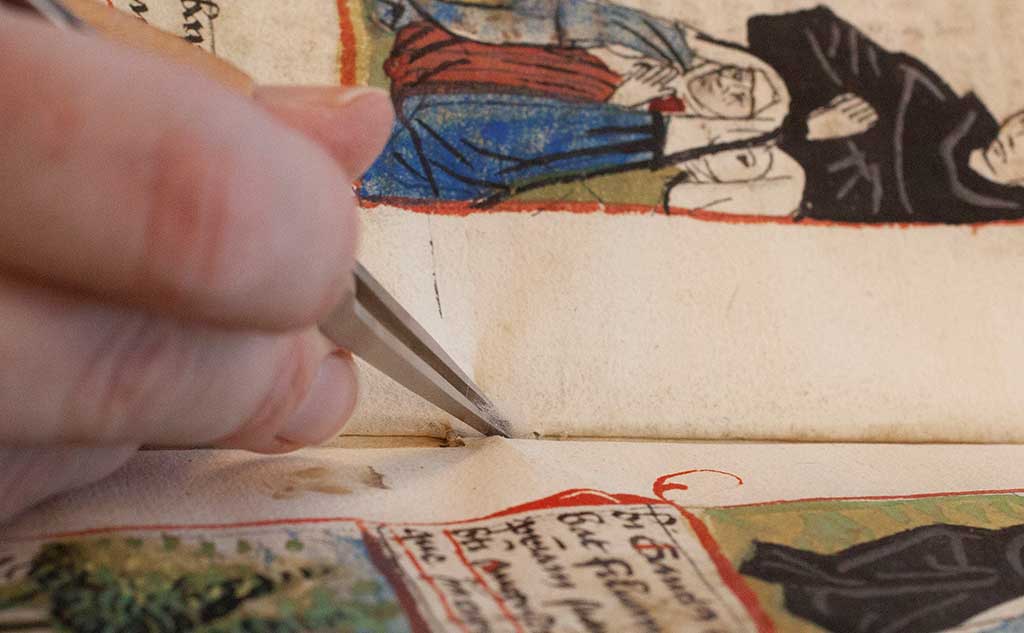
After consolidation, the cracked areas in the paper were repaired. As previously mentioned, copper media reacts negatively to moisture, heat, light, acids, and bases, which limited the choice of repair materials. An additional complicating factor were the illustrations themselves: as the cracks predominantly ran through the hand-inked miniatures, standard paper repairs ran the risk of marring the beautiful illustrations since even the lightest weight Japanese paper would be visible when applied to the surface of the artwork.
After much consideration, the cracked areas of paper underneath the illustrations were repaired using a fine fiber stitch technique developed by conservators at the British Library to repair tears in a copper-corroded Mercator Atlas. The technique uses individual kozo fibers from blended Japanese paper to place almost-invisible bridges over tears using a minute amount of dry wheat starch paste. The repair resembles stitches, hence the name, but does not actually go through the paper, and it uses an infinitesimally small amount of moisture to limit potential damage to the copper media. Because the repairs are nearly invisible, this treatment could also safely be employed over the illustrations without negatively changing the aesthetic impact of the drawings.
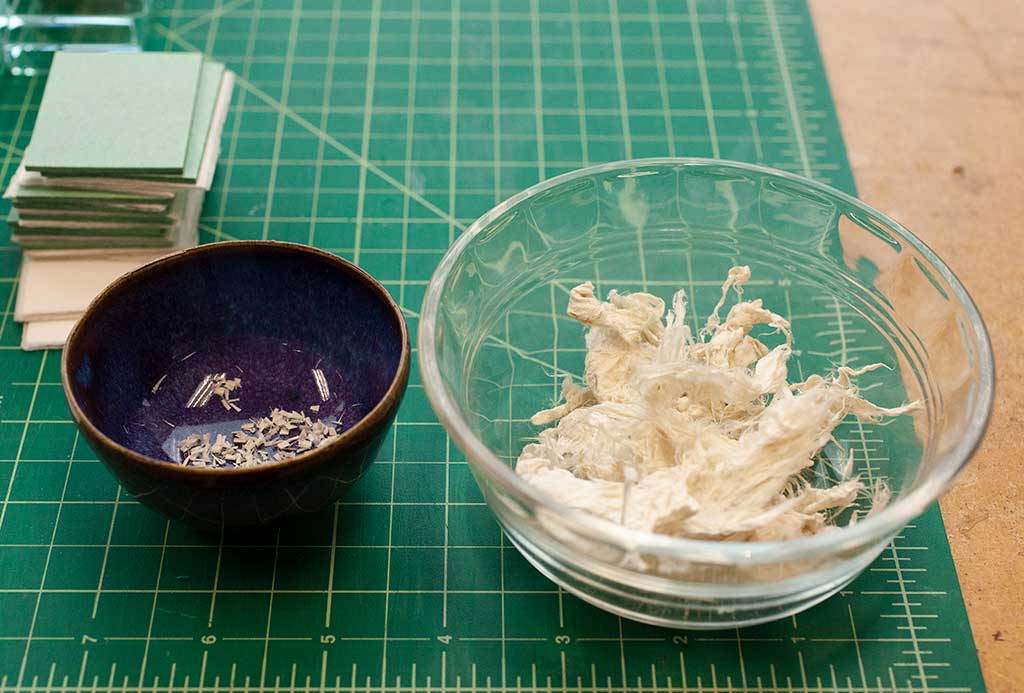
Japanese kozo fibers after blending (right) and after combing/trimming (left)
To prepare the fibers, RK27 Japanese kozo paper was soaked in filtered water, then blended until the fibers separated. The fibers tended to form clumps in the blender, so the fibers were separated and combed so that they were all oriented in the same direction. The combed fibers were dried and then trimmed into smaller segments approximately 5mm in length. Once dry, these fibers could be stored indefinitely until needed. Because the treatment took several months, it would have taken too much time away from the mending process to blend the fibers daily and it was useful to be able to prepare and dehydrate the fiber in one large batch. Prior to making repairs, the fibers were rehydrated using a drop of filtered water. The fibers were then teased apart using tweezers and a microspatula.
 Rehydrating pre-prepared kozo fibers with filtered water
Teasing apart wet kozo fibers with a pair of tweezers and a microspatula
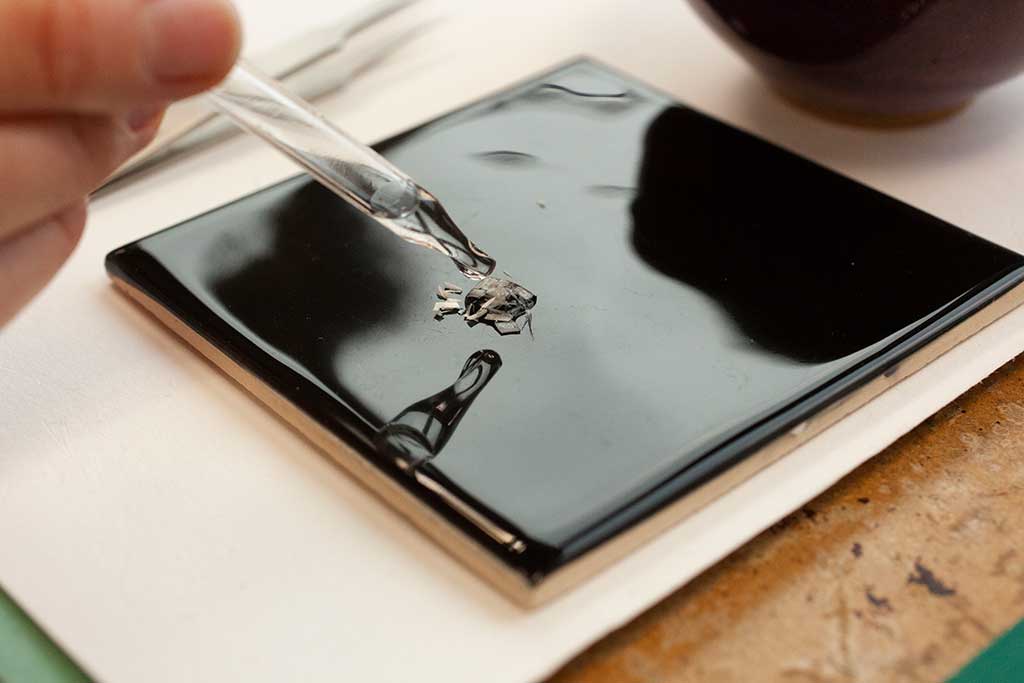
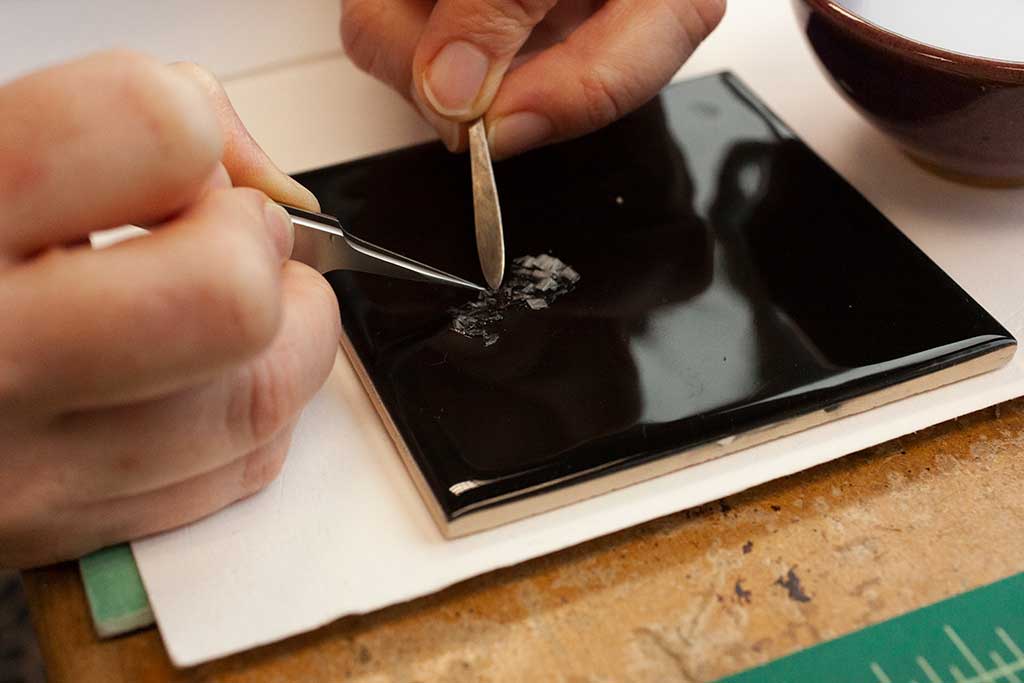
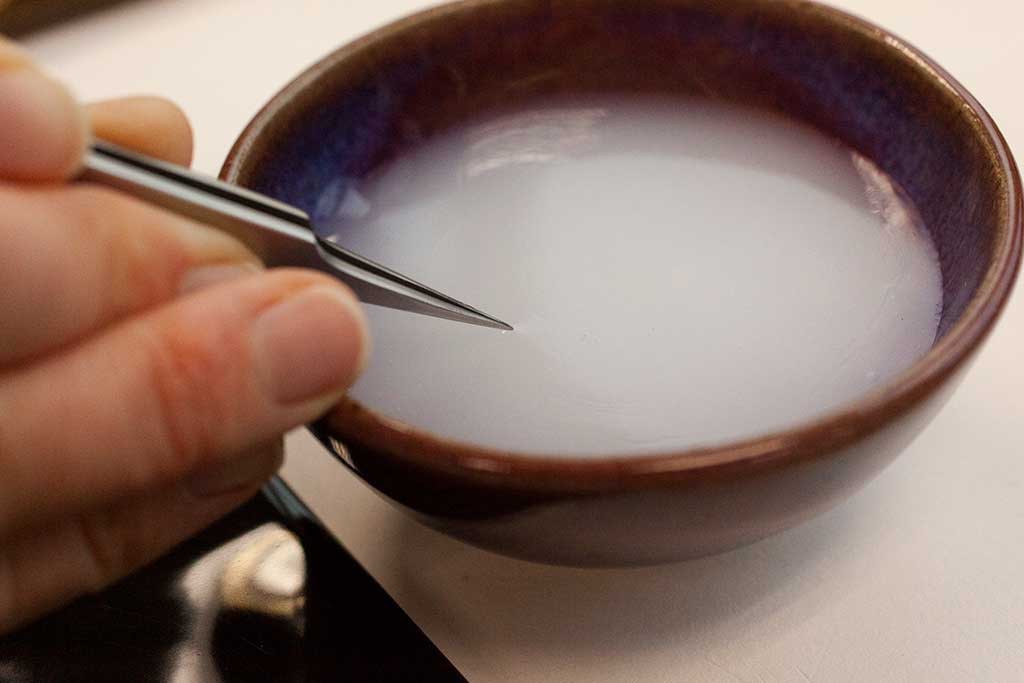
To perform repairs, a single kozo fiber was picked up using pointed-tip tweezers and trimmed with scissors to approximately 2-3mm in length. This additional trimming was necessary to ensure that the fibers were consistent in length and also to minimize the visual impact of the repair. The fiber was then dipped into a dry wheat starch paste and then blotted on a ceramic tile to remove excess moisture.
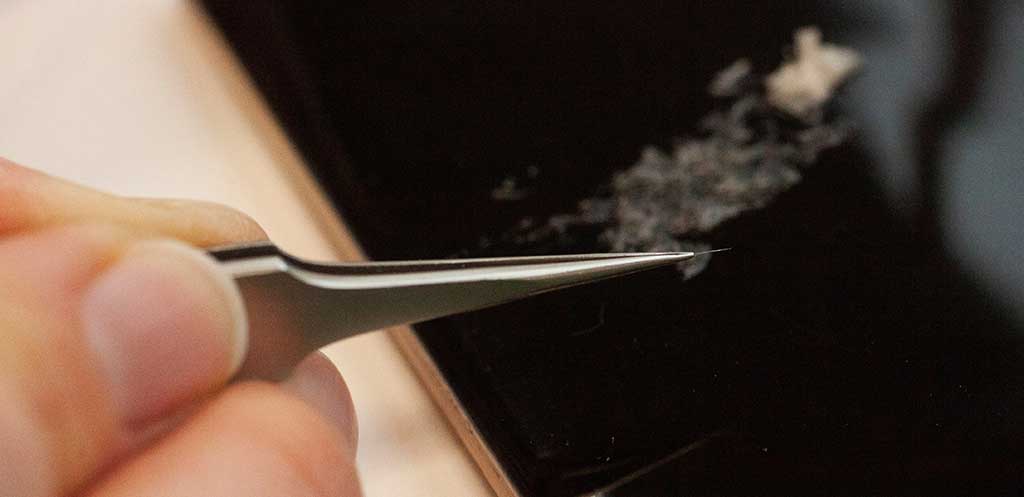
Detailed view of a single kozo fiber
Dipping the kozo fiber into dry wheat starch paste
After blotting, the trimmed kozo fiber was applied to the fractured paper, laying the fiber across the breakage. After the fiber was aligned properly, it was very gently tamped down using a microspatula, and then placed underneath a Hollytex and blotter packet. Light pressure was applied over the mend, either with a fingertip or a small glass weight. Because so very little moisture is used in this repair method, the mends dried very quickly. It was necessary to work quickly as any delay in putting the fiber down once it had been dipped into the wheat starch paste could result in the adhesive drying to the point where the mend was ineffective. Once the mends were dry, this process was repeated as necessary, spacing the kozo fiber bridges approximately 1-1.5mm apart. The bridges were placed along the entire length of the crack, and on both recto and verso to avoid tenting.

Applying the wheat starch paste and kozo fiber to a cracked area of the page. Previous repairs were dried under light pressure using a glass weight, blotter, and Hollytex.
Before conservation, the cracks in the illustrations were causing the paper to flex and mechanical wear from this flexing action had resulted in small losses. After conservation, this seesawing motion no longer occurred and the risk of loss was minimized. The repairs are nearly invisible and can often only be seen under magnification. They are slightly more apparent under raking light, as seen below, but even in this example a photographer has boosted the image’s contrast so that the repairs are visible for the purposes of illustration.
A miniature with cracks and losses before conservation
After conservation, the cracks have been stabilized with many nearly invisible kozo fiber mends
Filling Losses
After stabilizing the cracks in the paper, the larger paper losses caused by long-term copper corrosion were filled. The paper surrounding the losses was brittle, and was at immediate risk of further loss if the pages flexed during reading or if the jagged edges of the losses caught on adjacent leaves. Gampi paper, a Japanese paper made with fibers from the tree of the same name, was chosen for the fill pieces because it was fairly lightweight, yet opaque and so would have an appearance sympathetic to the paper of the text block without being too heavy or inflexible. Additionally, gampi paper tends to feather with shorter fibers than kozo, so was ideal for this particular type of fill where the fibers needed to overlap the illustrations as little as possible.
Gampi paper was selected for its opacity, color, and relatively short paper fibers
The curators were given the choice between leaving the fill paper as-is, meaning that it would be a light cream color not dissimilar to the paper of the text block, but immediately visible in the context of the illustrations; or having the fill paper toned to a sympathetic green color so that it would blend into the background of the illustration. After careful consideration and discussion, the client opted for the untoned Japanese paper fills, both to minimize the introduction of outside materials and to make it immediately obvious to the viewer that this was a repair and not part of the original material.
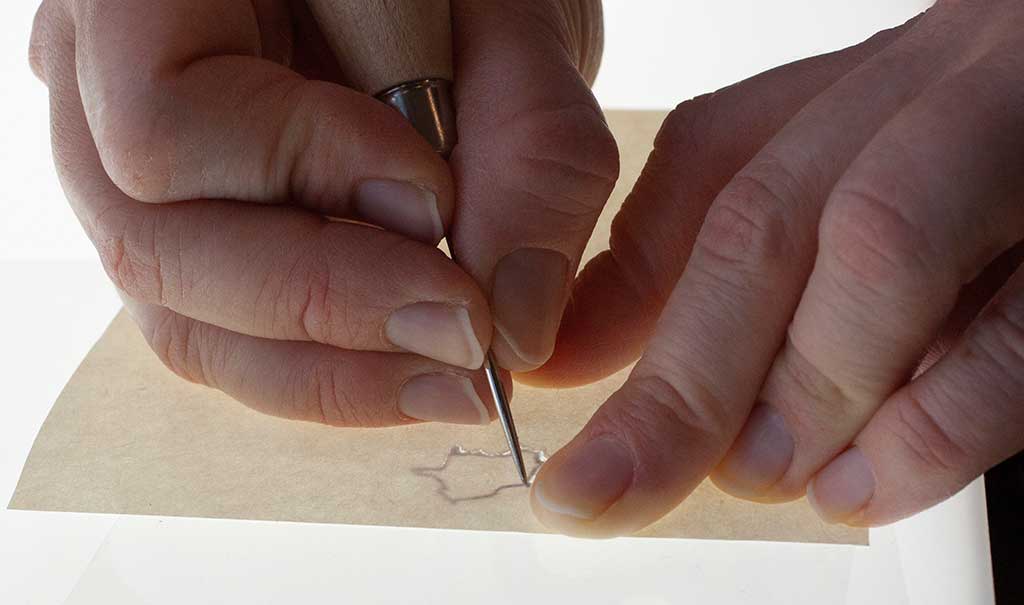
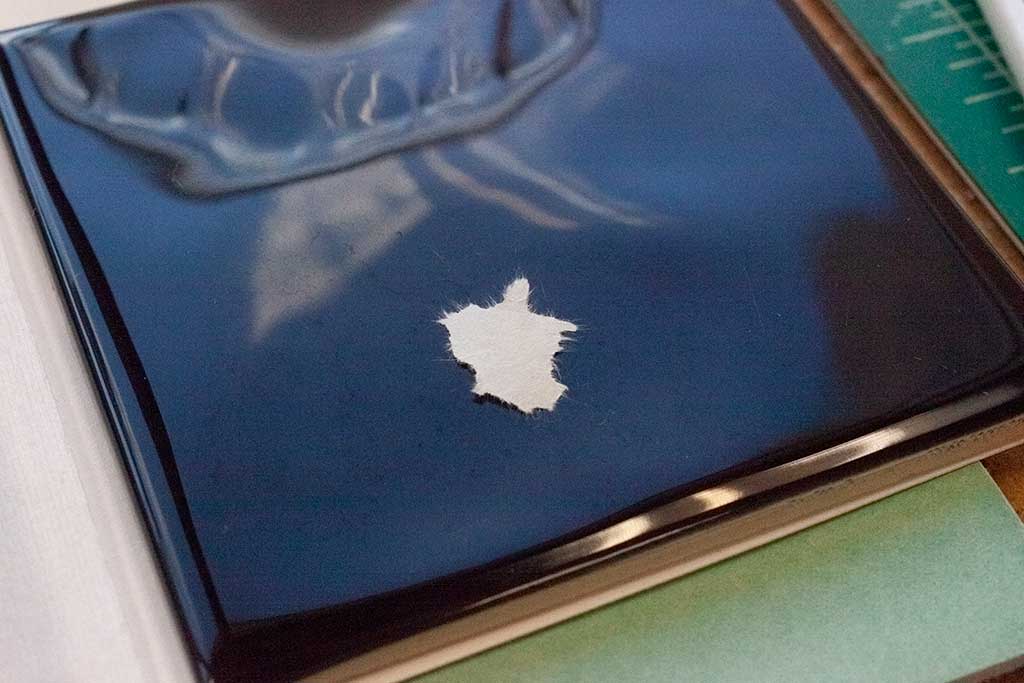
Using a needle tool to score gampi paper along the outline of the loss
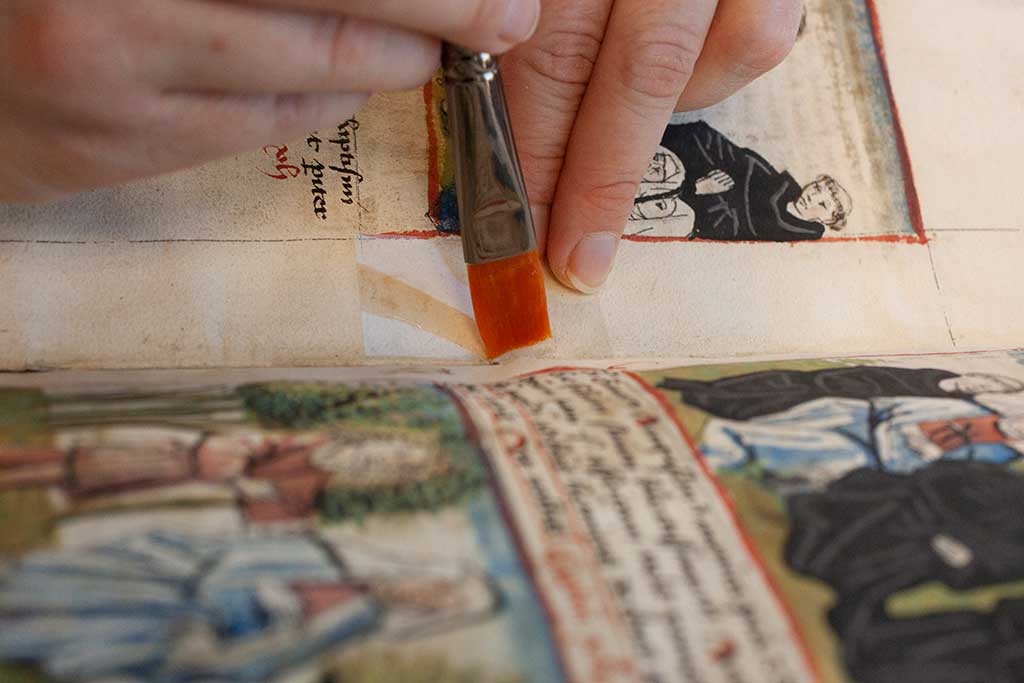
To create the fill pieces, the outline of the loss was traced onto a piece of Melinex. A needle tool was used to score a medium weight Japanese gampi paper along the outlines of the loss, and then the paper was torn along this score line so that the fill piece had a lightly feathered edge. The fill piece was checked against the outline of the loss to make sure that it was neither too large nor too small, and then the fill piece was adhered over the loss area with a very dry wheat starch paste.
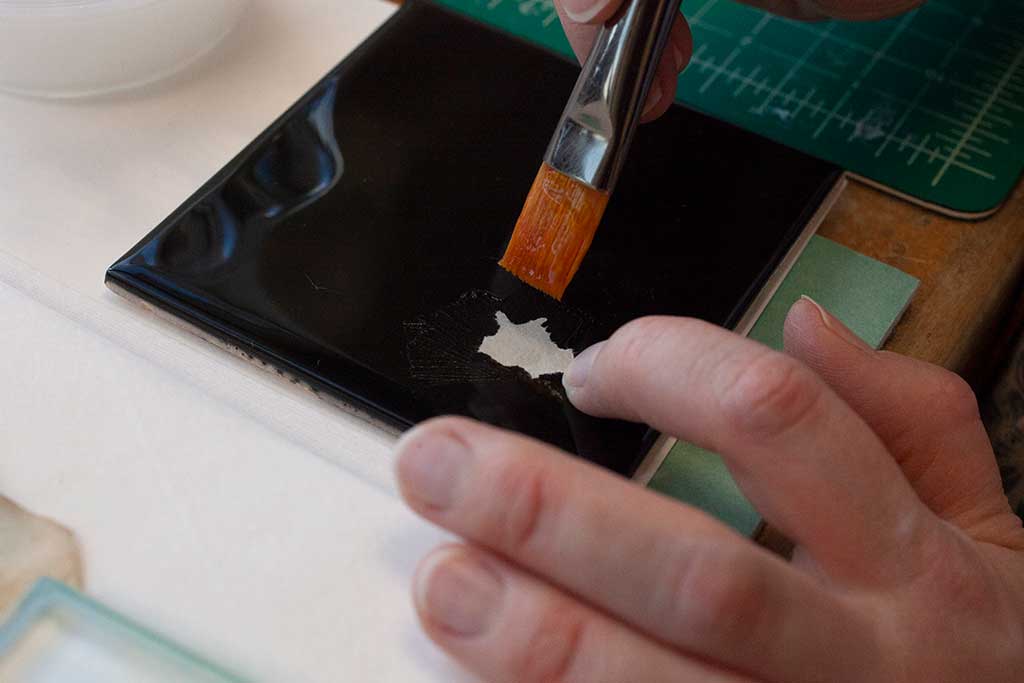
Applying dry wheat starch paste to a gampi paper fill piece
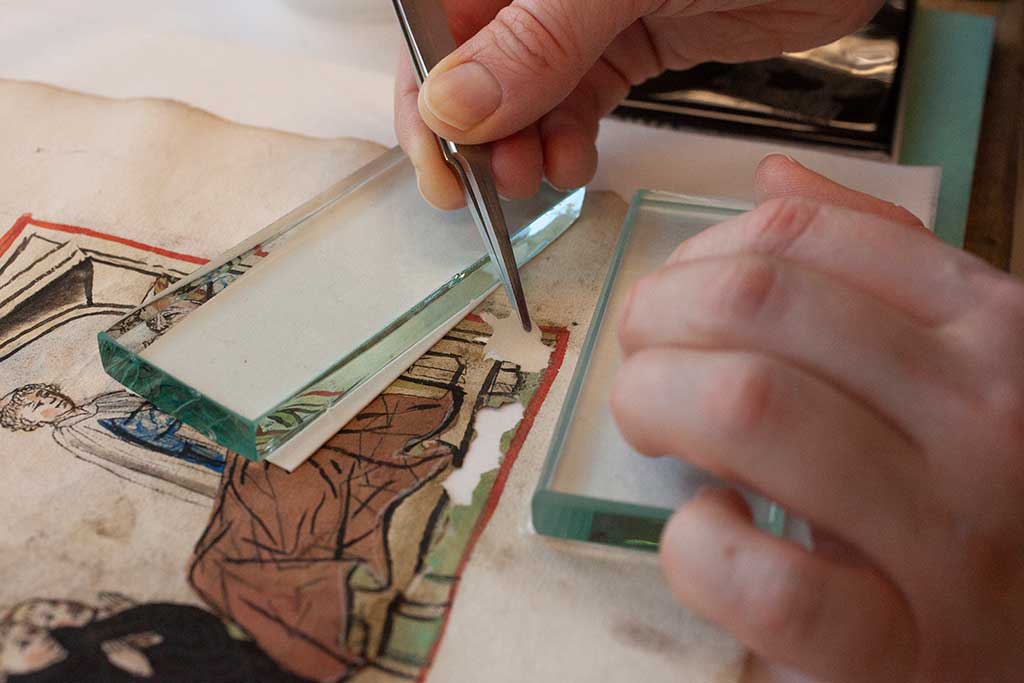
Applying the pasted-out fill piece to the loss
Filling the losses prevented the paper from unnecessary flexing and the feathered edges of the fill piece acted similarly to the fine fiber stitch repairs, meaning that the fragile loss edges were no longer in danger of breakage. Because only a small amount of gampi fibers from the feathered fill pieces extended onto the illustrations, it minimized the introduction of moisture and avoided obscuring the art.
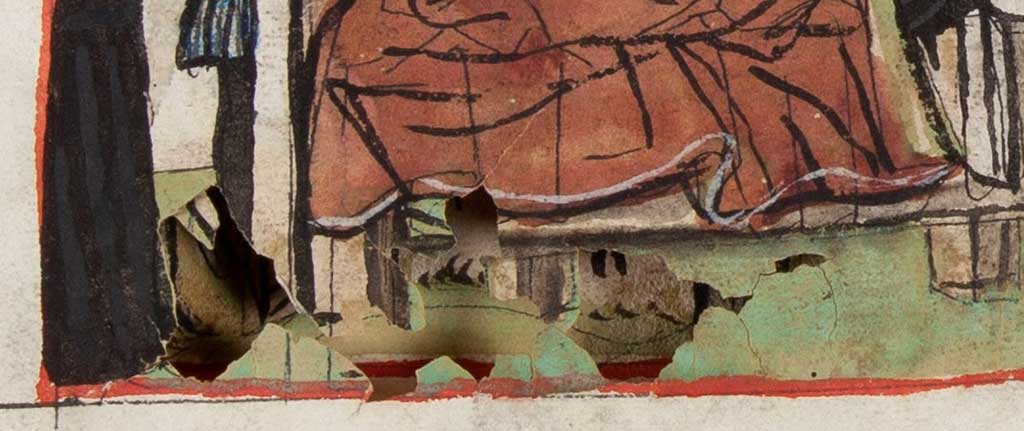
Large losses before conservation
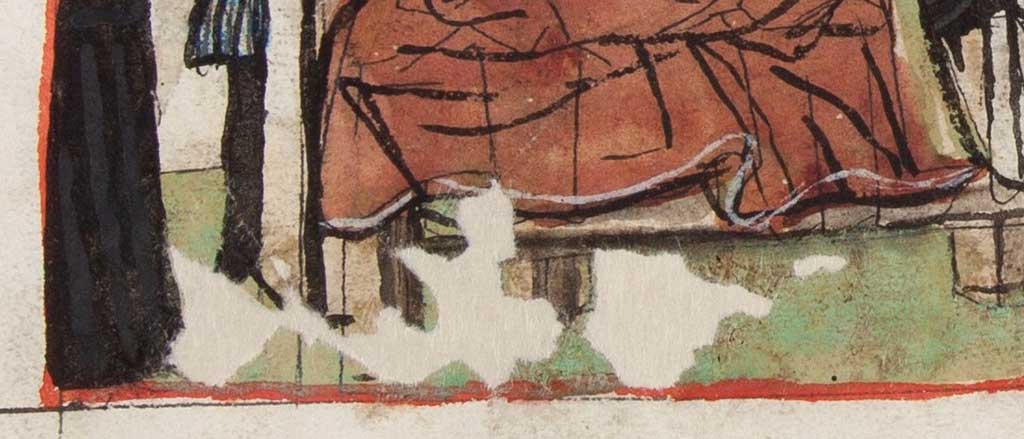
The filled losses after conservation
Mending and Guarding
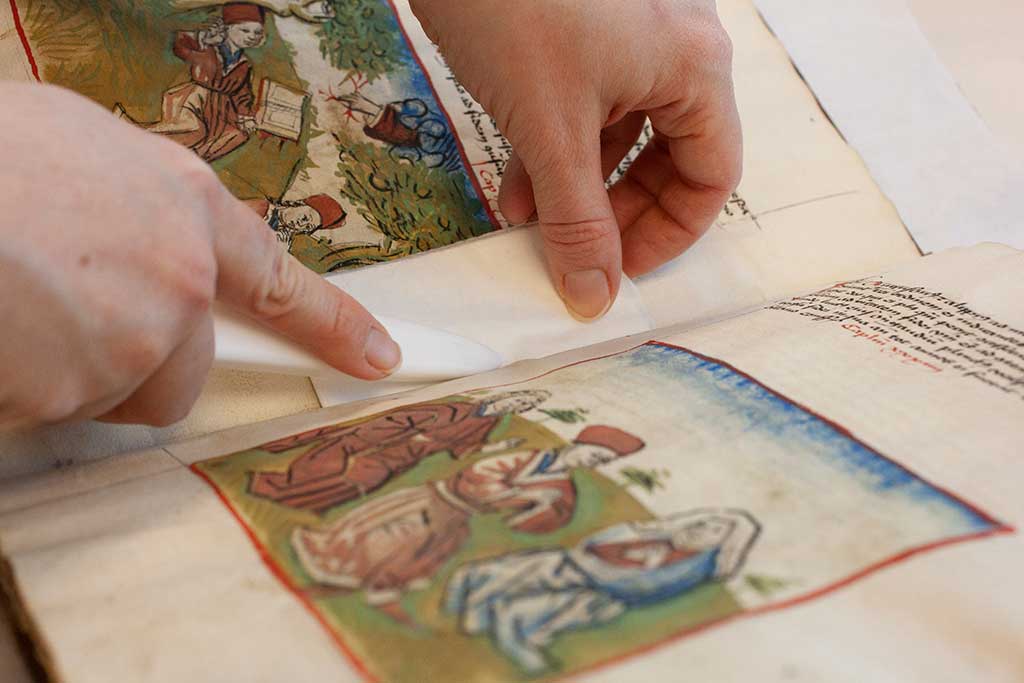
Once the fracturing and losses were mended, the rest of the text block could be repaired. Mending tears and filling losses along the edges of the text block was very straightforward, requiring only local humidification to unfurl creases and folds, and basic repairs with Japanese paper and a dry wheat starch paste. In areas where the paper was cockled, fills and mends were shaped during drying to follow the undulation of the rest of the text block.
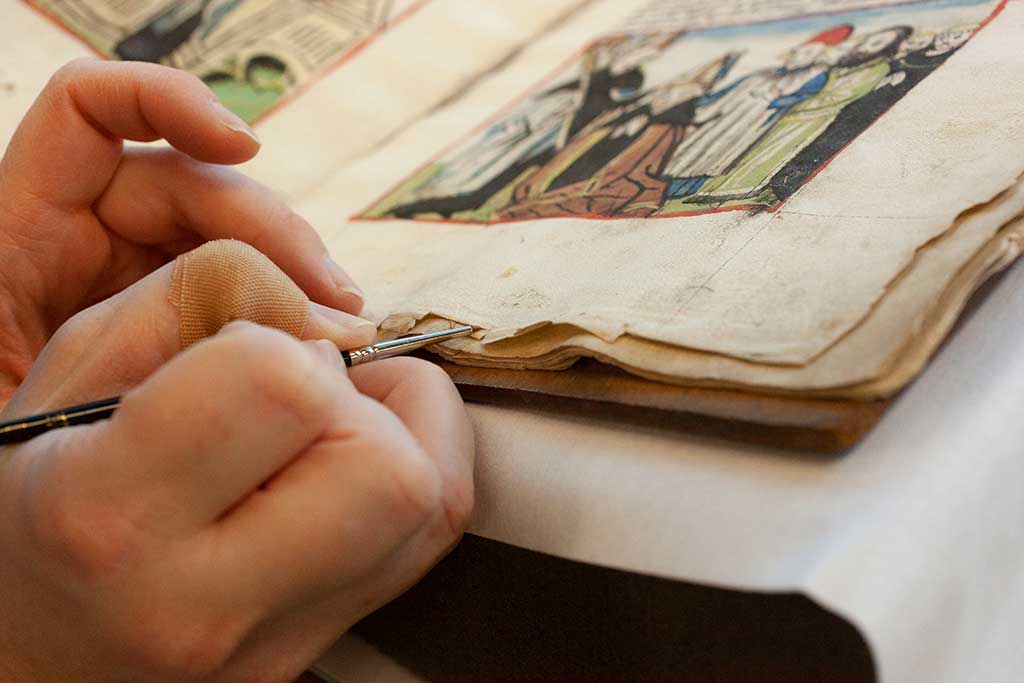
Unfurling creases and folds along the edges of the text block prior to mending
Guarding the spine folds in situ was a little more complicated. Although the text block only contained 5 sections, adding guards could introduce additional swell at the spine and place strain on the alum tawed skin. This could risk splitting the spine material or board attachments, so a lighter weight Japanese tissue was used during guarding to reduce the amount of bulk. It was too messy and difficult to paste up the Japanese paper and then insert it between bifolia – the paper was too flimsy and fragile to be pushed through with tweezers when pasted, and the paste could potentially transfer to areas where it shouldn’t be.
Inserting Japanese kozo paper between bifolia using a pair of flat tip tweezers
Instead, slips of Japanese kozo paper were inserted between the bifolia, the adjacent paper was masked off using Melinex, and then wheat starch paste was applied to the repair tissue. The repair tissue was then wrapped around the spine fold. The pasting-out piece of Melinex was then removed and a layer of Hollytex was placed between the bifolia to prevent them from adhering together.
Melinex was temporarily used to mask off the area underneath the kozo paper repair material while paste was applied
The newly-applied guard was dried by sandwiching the repaired area between Hollytex and blotter packets and gentle pressure was applied with a bone folder until dry. This resulted in a guard that was nearly invisible, did not distort or discolor the surrounding paper, and did not require disbinding the text block. Because the original sewing was not removed, many of the guards in the innermost bifolia were placed individually between sewing stations to avoid placing the tissue repairs on top of the previous sewing thread.
Drying the newly applied kozo mend with blotter, Hollytex, and a Teflon bonefolder
Stabilizing the Sewing
After the sections were guarded and the torn sewing stations mended, the original sewing was reinforced using a linen thread similar in appearance to the previous thread. A slightly thinner thread than the original was selected in hopes of keeping additional swell to a minimum. The sewing was reinforced around the previous thread, using the same sewing stations and sewing style.
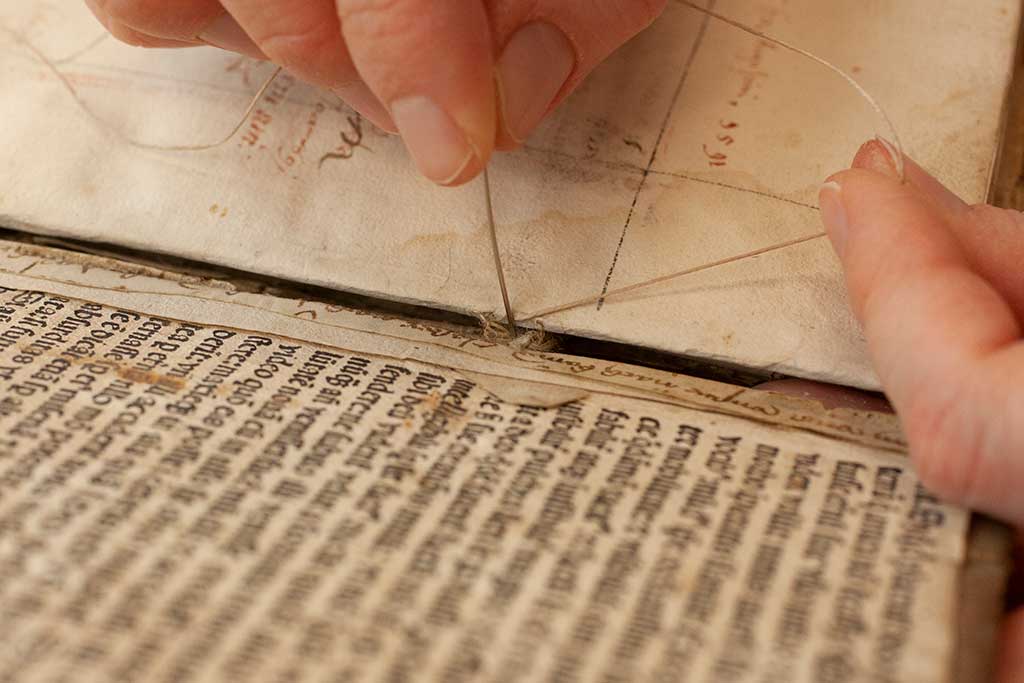
The sewing was stabilized with new linen thread alongside the original sewing
As the previous sewing was only loosely packed it was possible to place the new thread between the old thread when wrapping it around the raised cords. Since the alum tawed skin was missing over the raised cord areas, there was no need to disbind or lift any spine material to gain access to these areas. It was nevertheless a delicate process, since the volume could not be safely opened to 180 degrees and inserting the needle into some of the sewing stations was difficult.
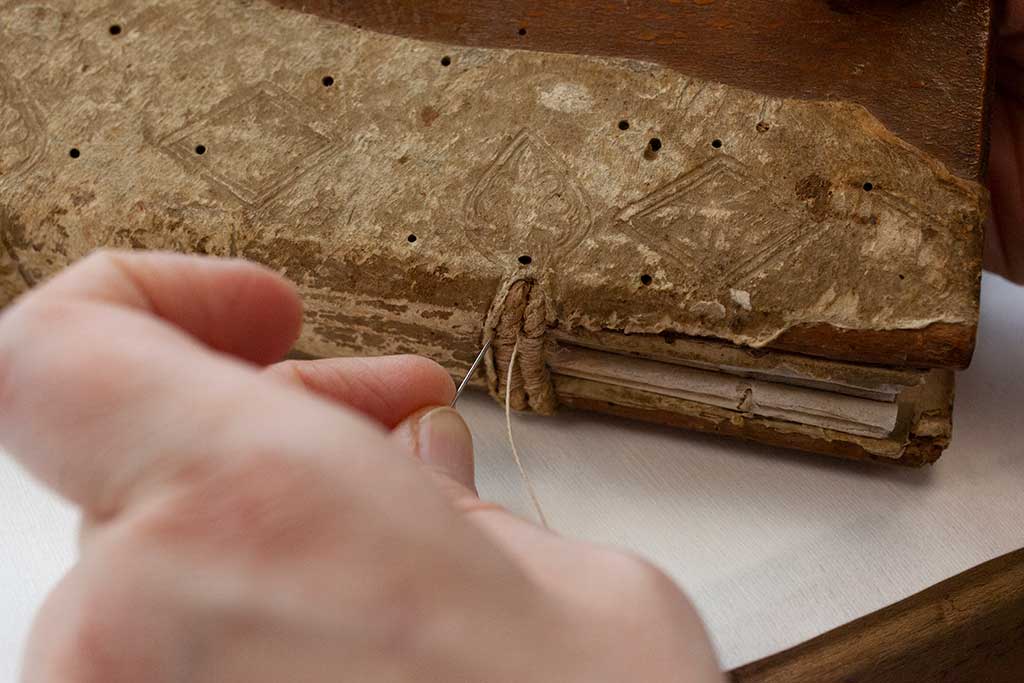
The sewing stations were easily accessible due to losses in the covering material above the raised double cords
The new sewing complements the appearance of the previous sewing, but slight differences in hue and thickness make it possible to distinguish between the two. These obvious visual differences will make it possible for scholars to differentiate between new and original materials in future studies of the volume.
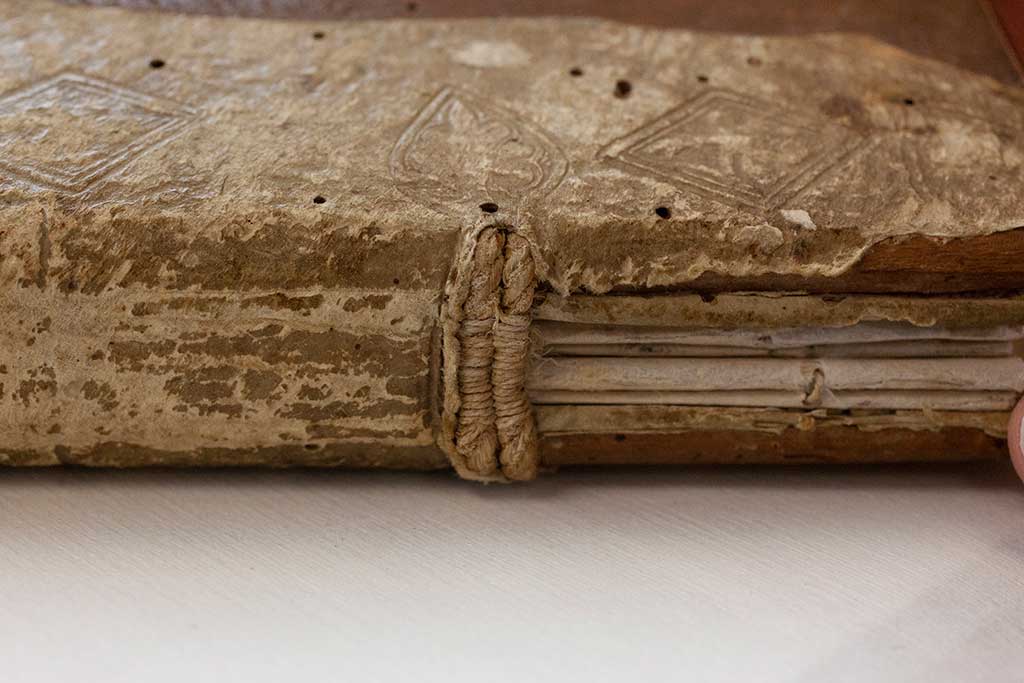
The new sewing is slightly thinner and lighter in color than the original sewing; although the two blend together well, it is still possible to distinguish old from new
The previous sewing was loose and broken within the text block – unsightly, and also prone to tangling. The loose thread was laid over the new sewing and adhered in place using small amounts of dry wheat starch paste. This creates the appearance of the original sewing and holds the loose threads in place, but is also easily reversible if needed.
The original sewing thread was loose and tangled inside the text block
The original thread was adhered to the new sewing with small dots of dry wheat starch paste, helping to preserve it in situ and prevent it from tangling or being lost
The spine material had losses, but was relatively stable otherwise. The decision was made to not to fill the losses in the alum tawed skin in order to avoid introducing new materials and adhesive unless absolutely necessary. One small split along the spine was reinforced with alum tawed skin and Lascaux 498HV adhesive since there was concern that this could split further if not stabilized.
DIGITIZATION
After conservation, the manuscript was digitized in NEDCC’s Imaging Services Lab in compliance with FADGI specifications. Creating visually accurate, high resolution images of the text block and binding is an important step in the preservation of the manuscript because it allows the Boston Public Library to offer primary research access via the digital surrogates. Even after conservation, the manuscript will still need to be handled carefully, and offering digital access to the volume will reduce mechanical stress from handling. The Life of St. Augustine manuscript is now available worldwide on the Digital Commonwealth at this link.
CONCLUSION
This beautiful 500-year-old manuscript presented a number of unique challenges throughout the course of treatment. Its many illustrations were cracked and at significant risk for loss or damage, so treatment was imperative. However, the repair materials and method needed to be chosen carefully to avoid exacerbating the already present copper corrosion and preserve the aesthetics of the hand-drawn miniatures. Additionally, the manuscript had never previously been conserved, a rare occurrence for a 15th century binding, and so conservation treatments needed minimize the loss of original materials, stabilize the structure to prevent future damage, and avoid introducing too many new materials. After much thought and consideration, the cracked miniatures were repaired with nearly invisible kozo fibers, and the book was resewn without ever being disbound. This treatment plan successfully stabilized the text leaves and binding while minimizing the visual impact of the repairs. The volume is again accessible to researchers – albeit with gentle handling – instead of being strictly off-limits, and can now be viewed digitally worldwide.
The Life of St. Augustine before conservation
The Life of St. Augustine after conservation
ACKNOWLEDGMENTS
Thank you to Bexx Caswell-Olson, Director of Book Conservation at NEDCC, and Terrance D’Ambrosio, Director of Imaging Services at NEDCC, for their encouragement and support of this project, Nora Pfund, former NEDCC Collections Photographer, for taking the beautiful photographs of the conservation process, Ann-Marie Miller of Codex Conservation for teaching me the fine fiber stitch repair technique back in 2013.
Special thanks to Beth Prindle, Head of Special Collections, Jessica Bitely, Preservation Manager, and Jay Moschella, Manager & Curator of Rare Books, of the Boston Public Library for their thoughtful input on treatment decisions throughout the process.