NEDCC Staff
NEDCC
Andover, MA
introduction
Many different kinds of books need protection and support. Damaged books may need to be held together while awaiting repair or as an alternative to repair. Books made of particularly vulnerable materials or of special value may warrant special protection. In most libraries, these needs can be met by a variety of enclosures. Complete enclosures that protect books from light and airborne pollution are by far the best solution.
This leaflet will explain the measuring requirements for custom protective enclosures for boxes—those made in-house as well as those to be made by a vendor. It will also illustrate how to make wrappers and polyester jackets for books with or without dust jackets.
Overview of Custom Protective Enclosures
An institution may opt to use custom protective enclosures with their collections for the following reasons:
- To provide books with structural support. This includes very thin, small, fragile, limp, or oddly shaped books that need boxes to hold them in shape, to protect them during handling, and to protect them from adjacent volumes on the shelf.
- To provide books with protection from dust, dirt, light, and mechanical damage.
- To prevent damage to books that the institution deems to be of great importance.
- To protect artifactually important volumes that have damaged bindings, especially when conservation treatment would alter their value or character.
- To provide supportive housing for damaged books of low value—or which are rarely used—and do not warrant treatment or repair.
Commercial library binderies and many archival supply vendors produce a wide variety of enclosures—including cloth-covered drop-spine boxes, corrugated clamshell boxes, and similar customized enclosures. Clamshells, wrappers, and polyester jackets are described below, followed by instructions on how to construct your own wrappers and jackets.
 |
| Cloth-covered Drop-spine Box |
 |
| Corrugated Clamshell |
 |
| Cardstock Wrapper |
 |
| Corrugated Wrapper |
 |
| Polyester Jacket |
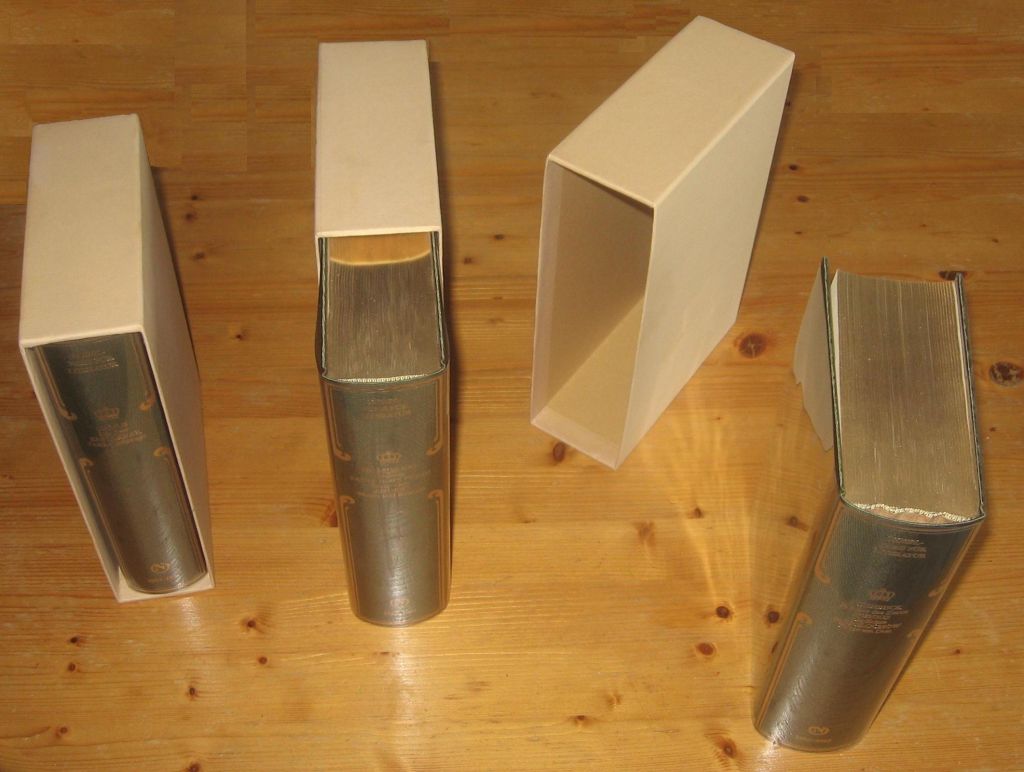 |
| Slip Cases Wikimedia Commons Photo by User: Jarlhelm |
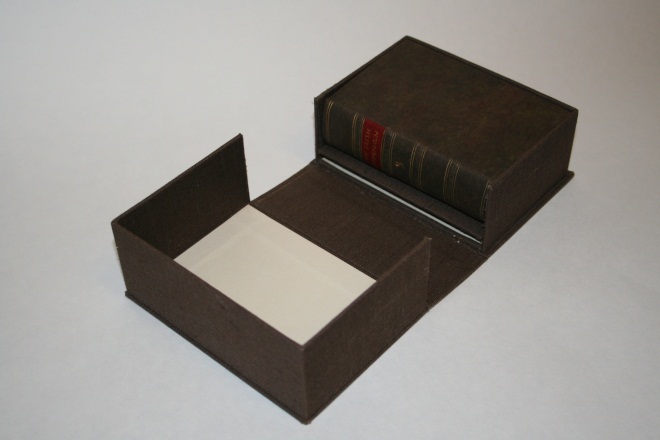
Clamshell Boxes
The two types of boxes appropriate for most books are the drop-spine box, also known as the clamshell or double-tray box, and the corrugated clamshell box. Drop-spine boxes have the following benefits:
- They provide an aesthetic presentation for valuable volumes.
- Their rigid structure helps restrict movement in parchment bound books that are stored in rooms that experience swings in relative humidity. (Parchment swells with increased humidity.)
- They are appropriate for very large and/or heavy volumes.
- They are appropriate for volumes that require custom interiors (like those with metal furniture).
The corrugated clamshell box is an inexpensive, utilitarian structure, which will serve for almost any volume. When ordered from a vendor, the product comes either as a clamshell or as a smaller wrapper version (see below) for thin volumes. If shipped flat, you will need to assemble it in-house.
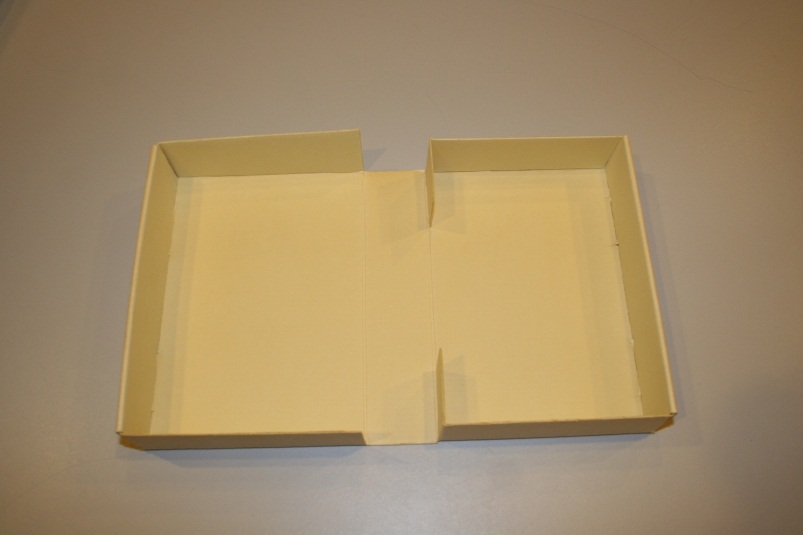
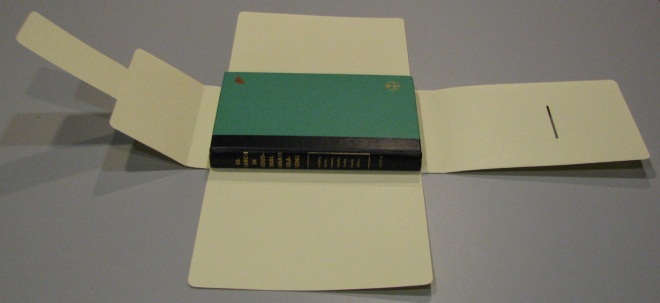
Wrappers
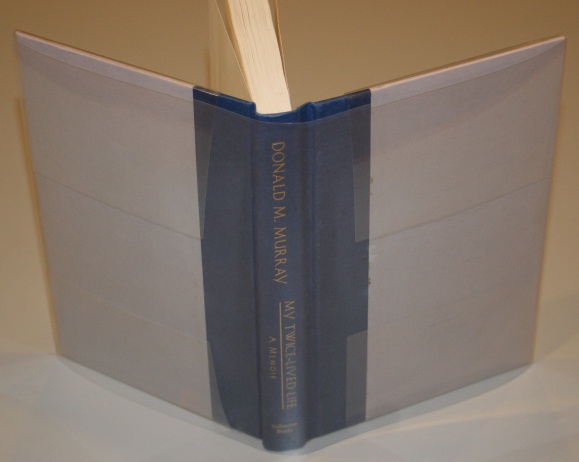
Many institutions will face the challenge of boxing large numbers of small, thin, or lightweight books and pamphlets. When drop-spine boxes or phase boxes are not appropriate because of cost—or the amount of shelf space they require—enclosures made of 10- or 20-point lignin-free card stock are a suitable alternative. Wrappers (generally four-flap enclosures as shown below) offer adequate protection for books less than 1/2 inch thick. Wrappers are less practical for thicker volumes because they are easily pushed out of alignment, and the corners tend to gape when they are used on larger volumes, allowing light and dust to enter the box.
Polyester Jacket
A transparent book jacket made of polyester film offers a number of benefits:
- A jacket protects the book cover from dirt and from scuffing as the volume is handled and shelved.
- A jacket contains powdery red-rotted leather and prevents it from rubbing off onto adjacent volumes.
- The cover and title of the book can be seen through the transparent jacket.
- Shelf labels can be attached to the jacket's spine rather than directly to the book, avoiding possible damage to the binding from unstable label adhesives.
Book jackets made of polyester film have these disadvantages:
- Polyester has a strong static charge and so will attract dust and dirt.
- Polyester scratches easily, reducing the long-term value of the jacket in situations where presentation is a consideration.
- The simple wrap-around style jacket is sometimes held in place with tape or straps, which can damage the book or trap dust.
- The wrap-around style jacket does not cover the edges of the book, leaving them exposed and subject to abrasion.
Slip Cases
Slip cases should not be used to hold books because bindings are abraded as books slide in and out of them. In addition, book spines are unprotected from light.
Measuring for Custom Protective Enclosures
It is important for a box to fit the measurements of the book it encloses. A loose fit does not provide the needed support and allows the book to shift inside the box, exposing it to just the sort of abrasion the box was constructed to avoid. Meanwhile, a fit that is too tight can cause damage to the edges and joints of the cover.
Whether you construct your own custom-fitted book boxes or order them from suppliers, you will need to measure the height (H), width (W), and thickness (T) of the books to be boxed (Figure 2). The easiest way to do this is by using a measuring device such as the MEASUREpHASE™ (Figure 3). This exact device is no longer available for sale; however, Preservation Equipment Ltd and CMi carry similar products.
 |
 |
|
| Figure 2 | Figure 3 |
 |
| Figure 4 |
For measuring a small number of books, no equipment is necessary except for a perfectly flat work surface with a smooth vertical wall or surface on one side of it: for example a table against a wall or a sturdy cardboard box with two sides cut away.
Use the following tools: (a) a ruler at least as long as the longest book to be measured, and (b) a triangle with one side at least as long as the width of the widest book to be measured. Zero should begin at the very end of the ruler, not slightly inward from the end (Figure 4).
Measure width (W) by laying the book on the tabletop with its spine touching the backstop. Do not compress the book against the backstop, but allow it to retain its normal size and shape. (Pushing the book against the backstop will change its shape and cause the measurements to be too small.) Stand the triangle on the tabletop with its vertical side touching the fore edge of the book at the book's widest point. Place the ruler on top of the book with its end touching the backstop. The point on the ruler where it meets the triangle is the book's width (Figure 5). It is good practice to make measurements at several points and use the widest of these measurements. Remember to count the protrusions of raised bands or clasps as part of the width of the book (Figure 6).
 |
 |
|
| Figure 5 | Figure 6 |
Measure the height (H) in the same manner as the width: by laying the book on the tabletop with one of its ends touching the backstop. Again, make measurements at several points and use the highest.
 |
| Figure 7 |
Thickness (T) is measured differently. First, lay the book on the tabletop. Stand a ruler on end vertically beside it, and hold a triangle against the backstop so that its vertical edge is flat against the backstop and its horizontal edge is parallel to the tabletop. Lower the triangle—maintaining its contact with the backstop—until the horizontal edge of the triangle encounters the thickest part of the book. The measurement where the horizontal edge of the triangle crosses the ruler (Figure 7) is the thickness. Make measurements at several points and use the thickest.
Now that you have the measurements of the book, you can construct a box yourself or order one by sending the measurements to a commercial boxmaker.
Directions for Construction
The materials used to construct a box should be permanent, durable, and acid-free. Any materials in direct contact with a book or pamphlet should also be lignin-free and buffered. Although more expensive, these materials will be more robust and remain acid-free for a much longer period than less expensive materials. If ordering boxes from a vendor, ensure that the board being used is chemically stable.
Card Stock Wrappers for Small Books
Materials and Tools Needed
- 10- or 20-point calendared, lignin-free card stock. Small pamphlets require the lighter-weight stock; larger materials require the heavier weight.
- Bone folder
- Scissors
- Mat knife
- Board shear (optional)
- Straightedge
- L-shaped ruler, T-square, or large triangle
- Self-healing cutting mat, or piece of mat board or binder's board on which the card stock can be creased
- Stable adhesive or double-sided tape
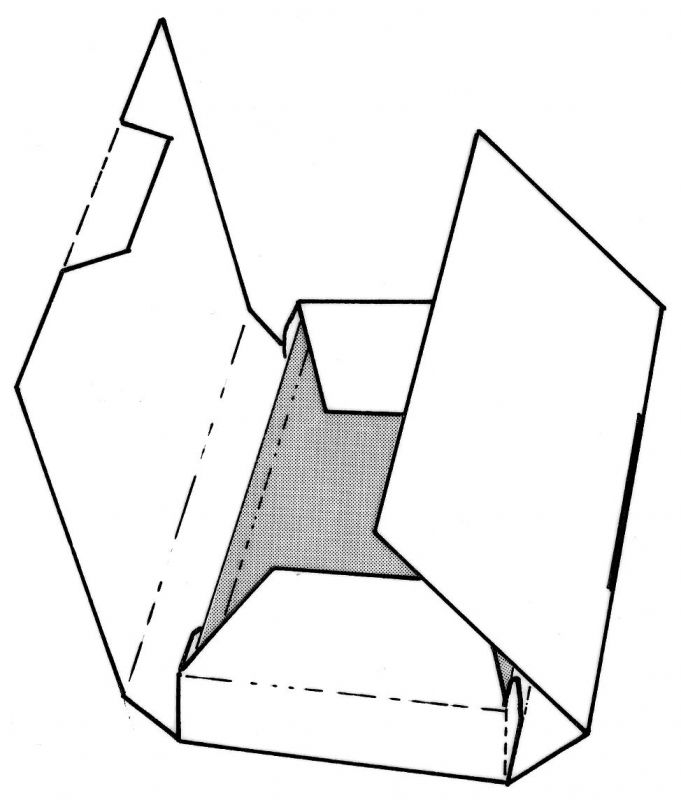
Construct a ruler-template by placing the book on a strip of paper or card and making measurement marks for longest length (L), widest width (W), and greatest thickness (H) (Figure 8).
 |
| Figure 8 |
Select a sheet of card stock from which the two strips that constitute the wrapper can be cut. Determine the grain direction of the sheet, and cut the strips so that the grain is parallel to the expected fold-lines of the wrappers. (The grain is the direction in which most of the fibers of the stock run. A fold made parallel to the grain folds more easily than one made against—at right angles to—the grain.) Measure each section according to Figure 9.

|
Using an L-shaped ruler, T-square, or triangle and a bone folder, crease and fold the wrappers at all marks. Using the point of the bone folder on the surface of the card stock, score the card along the edge of the ruler as if you were drawing a line with a pencil. Press the point of the bone folder into the card and pull it along the edge of the ruler, creating a groove. If you are using 10-point card stock, press lightly to avoid tearing the material. Hold the ruler down firmly to prevent slippage. Without releasing the ruler, reinforce the crease by inserting the bone folder under the card and rubbing it firmly against the ruler to accentuate the crease.
Using your template, measure, mark, and cut the tongue according to the (Figure 9) above.
Apply double-sided tape to the outside wrapper base, just inside the folds. Place the inside wrapper base on top of it, aligning the outer edges of the wrappers. Press down firmly to ensure complete adhesion, then insert book and tuck in the tongue (Figure 10).
 |
 |
|
| Enclosing Book in Finished Wrapper | Figure 10 |
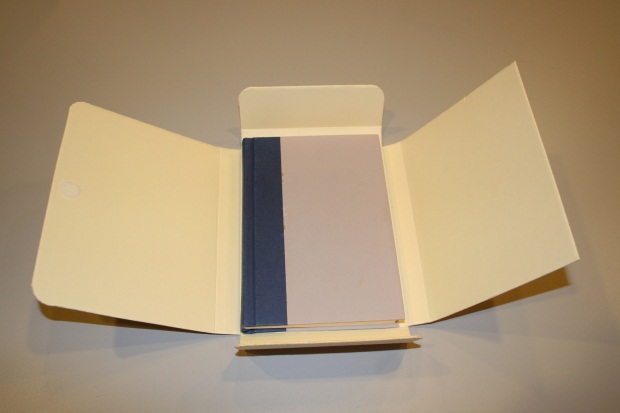
Polyester Film Book Jacket
The polyester film used should be free of plasticizers, ultraviolet inhibitors, dyes, and surface coatings so that the film does not interact with the material it is intended to protect and thereby hasten its deterioration. Four (4) mil polyester is suitable for most books.
The easiest polyester jacket is a simple wrap-around (Figure 10).
Because it is not fixed in place on the book, a jacket of this design tends to shift out of alignment, especially when used on a large and heavy book.
A more complex polyester jacket avoids these problems by incorporating flaps which hold the jacket on the book and which cover and protect the edges of the book.
Polyester Film Jacket with End Flaps
When constructing polyester jackets, you will need a straight-edge, a bone folder, and either scissors or a mat knife. Cutting and creasing can be done on a self-healing mat or on a large piece of mat board or binder's board.
Cut a piece of polyester with a vertical dimension equal to 1.66 times the height (H) of the book and a horizontal dimension 4 times the width (W) of the book plus the thickness (T) of the book (Figure 11).

|

|
Wrap the polyester around the book so that the edges of the polyester are even with each other and the book is centered between the top and bottom of the polyester (Figure 12). Polyester has a smooth surface and care must be taken to make sure that the book does not shift, especially while being measured.
Place the book on a clean work surface and open the polyester flat, being careful not to change the position of the book on the polyester film (Figure 13).
Mark the position of the book on the polyester film by making dents with the point of a bone folder at the corners of the book and at both ends of the joint.
 |
 |
|
| Figure 13 | Figure 14 |
Wrap the polyester over the book again and turn the polyester and book over, taking care that the book does not shift on the polyester (Figure 14). Repeat measurements at the corners of the book and at both ends of the joint.
Using a straight-edge and bone folder, crease the polyester straight across connecting the dents as illustrated (Figure 15). Broken lines represent creases.
 |
| Figure 15 |
When creasing the polyester, place the straight-edge on the film with its edge next to, but not covering, the two dents to be used as guides. Create a crease by pressing down on the point of the bone folder while pulling it along the edge of the straight-edge. The straight-edge should be held down firmly to prevent slippage. Without releasing the straight-edge, reinforce the crease by inserting the bone folder under the polyester and rubbing it firmly against the straight-edge.
At all "a" locations (Figure 16) make a second crease parallel to the first, outside the first, and at a distance from it equal to the thickness of the book’s cover.
 |
| Figure 16 Cut as shown in Figure 17. Unbroken lines represent cuts. |
 |
| Figure 17 |
 |
| Figure 18 |
Fold the polyester film at all creases. Make the folds sharp by burnishing them with a bone folder. Remember that closely spaced parallel folds need to be made at all "a" locations to accommodate the thickness of the cover boards. After these have been made, shape them with your fingers until both folds take on a 90° angle. Dampening your fingertips slightly with a moist sponge will make this shaping of the folds easier.
Wrap the polyester film jacket around the book, tucking the end flaps inside the front and back covers. Tuck the top and bottom flaps between the outer surface of the book cover and the polyester film (Figure 18). (The top and bottom flaps will be visible through the polyester film jacket.) Remember, polyester film can be difficult to work with, and you may need a few tries to construct the jacket correctly. Practice makes perfect!
Conclusion
The care and protection of especially valuable or fragile materials can be facilitated by the careful selection and creation of custom enclosures. As with any custom process, understanding measurement and the interaction of materials with enclosures will ensure not only that the material will be protected, but that the special enclosure is optimal and does not create new and harmful conditions. Practice and care will allow affordable and easily available materials such as polyester film and card stock to prolong the life and use of items in a collection.
Sources of Custom Book Boxes
In addition to conducting a standard internet search for vendors of custom enclosures, you can also check the Active Members page of the Book Manufacturers Institute for Certified Library Binders, consult your regional chapter of the Guild of Book Workers, or check the American Institute for Conservation’s Find a Professional webpage to find individual binders in private practice who make drop-spine boxes. We suggest that you obtain information from a number of vendors so that you can compare costs and assess the full range of available products.
Acknowledgements
This leaflet is a combination of the following previously-published NEDCC Preservation Leaflets: 4.5 Protecting Books with Custom-Fitted Boxes, 4.6 Card Stock Enclosures for Small Books, and 4.8 Polyester Film Book Jacket, written by Richard Horton, Conservator, Bridgeport National Bindery, Inc. NEDCC gratefully acknowledges the work of Margaret R. Brown in illustrating these leaflets or providing the drawings upon which current illustrations were based.
copyright statement
© 2018. Northeast Document Conservation Center. All rights reserved.