
CONSERVING THE STATE OF ALABAMA'S DEFINING DOCUMENTS
From early 2018 through the start of 2019, NEDCC worked on conserving the State of Alabama’s six Constitutions, along with their Ordinance of Secession. The work was undertaken as part of the state’s bicentennial celebration and was many years in the making. The project had support not only from the Alabama Department of Archives and History, but also from Alabama's Legislature, who established a special Bicentennial Committee in preparation for the yearlong celebration.
The Alabama Department of Archives and History worked diligently to prepare educational resources for the public as well as several additional exhibitions leading up to the opening of the touring exhibit: We the People: Alabama’s Defining Documents.
The first venue for We the People was the Huntsville Museum of Art where the show opened on June 30th, 2019. The exhibition opened a second time at the Alabama Department of Archives and History on November 3rd, 2019 and is on-going until December 31st, 2019.
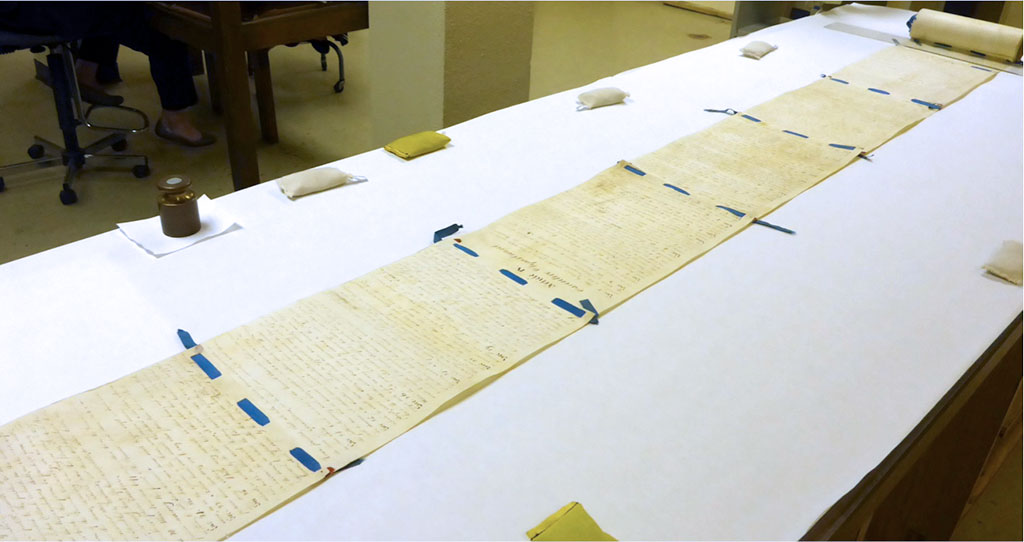
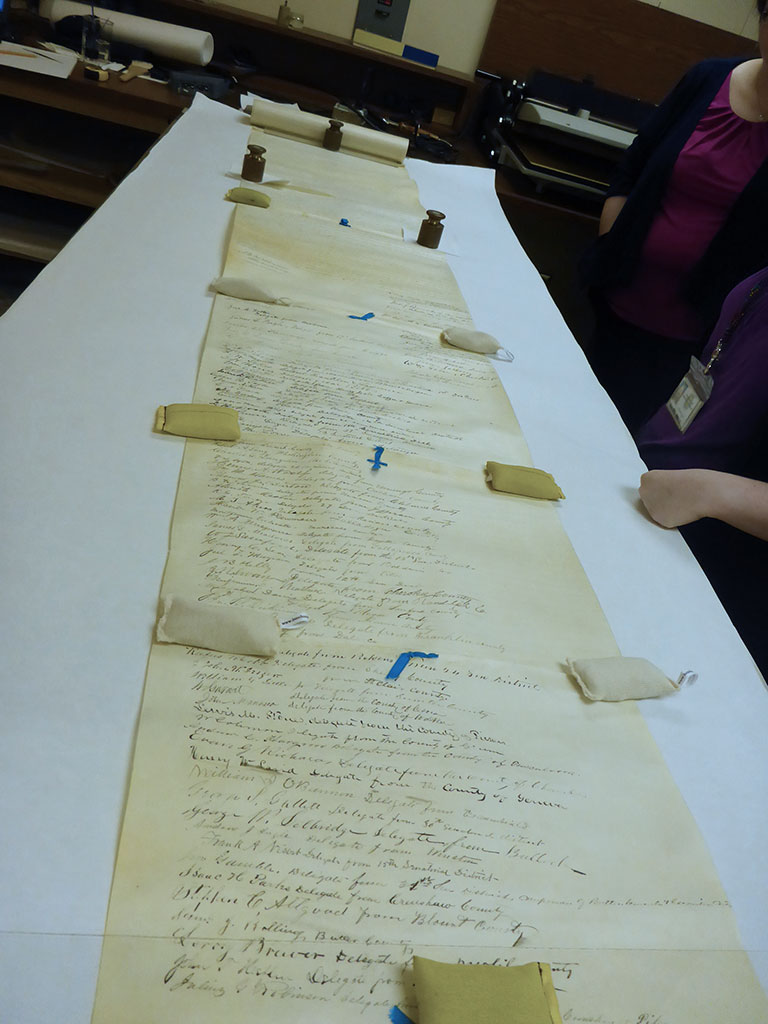
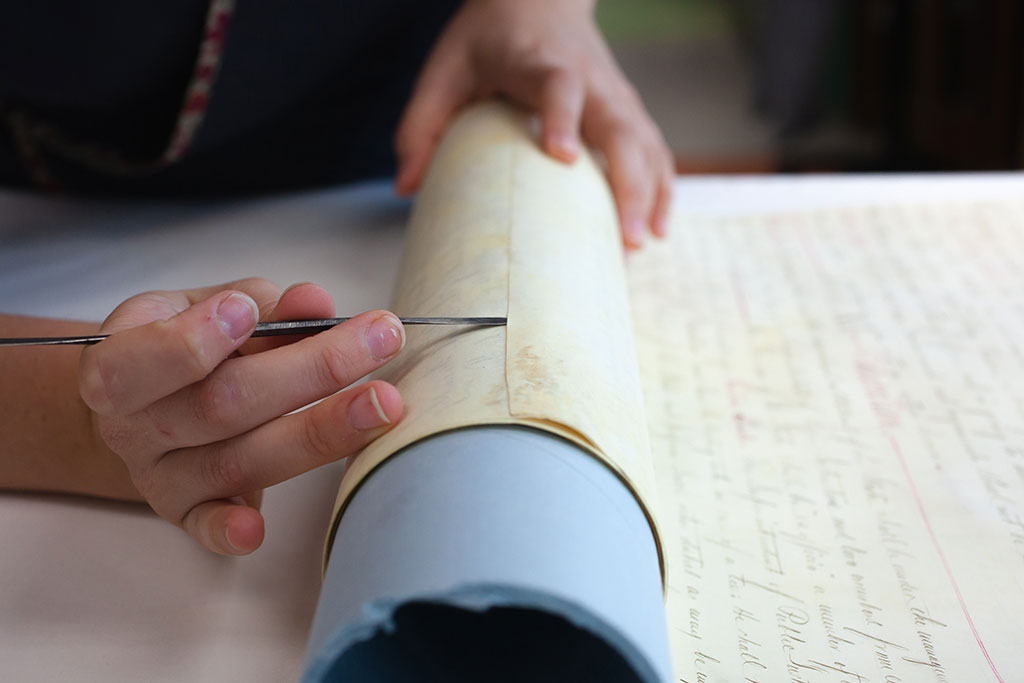
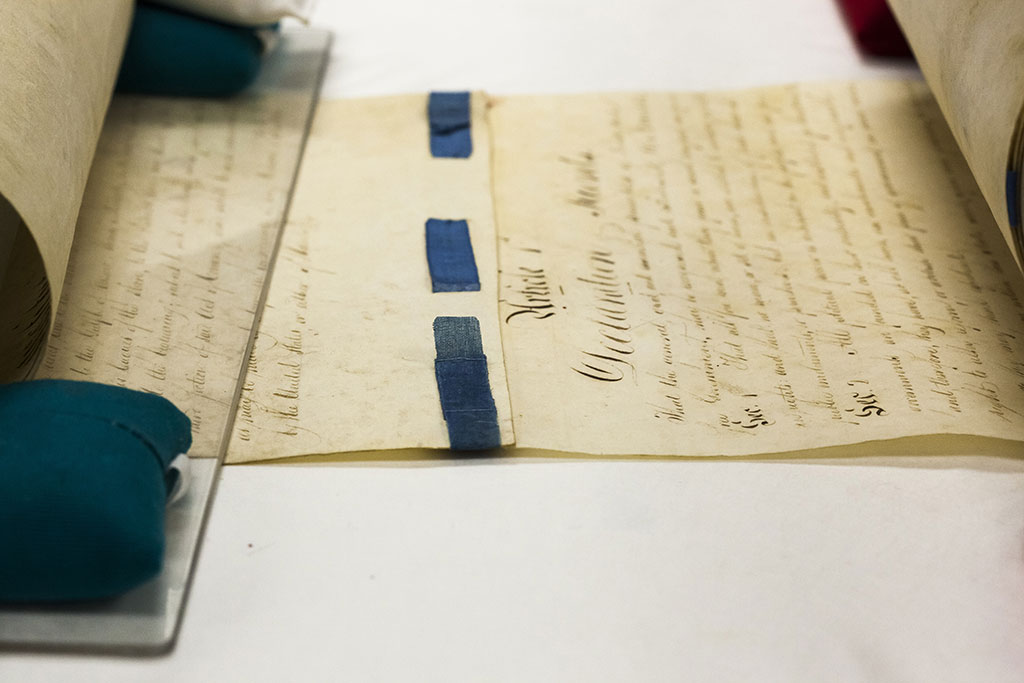
The 1819 constitution partially unrolled for examination
NEDCC Examines the Constitutions
The documents all required an initial examination to determine an appropriate treatment approach. However, this was not an easy task to do as four of the constitutions were between 20 and 43 feet long. Because of their length, the constitutions were examined in approximately 8-foot sections. This gave the conservators a general impression of the object’s history of use and current condition. Using specialized tools and magnification, the objects were tested to generally assess and identify problematic areas that required treatment.
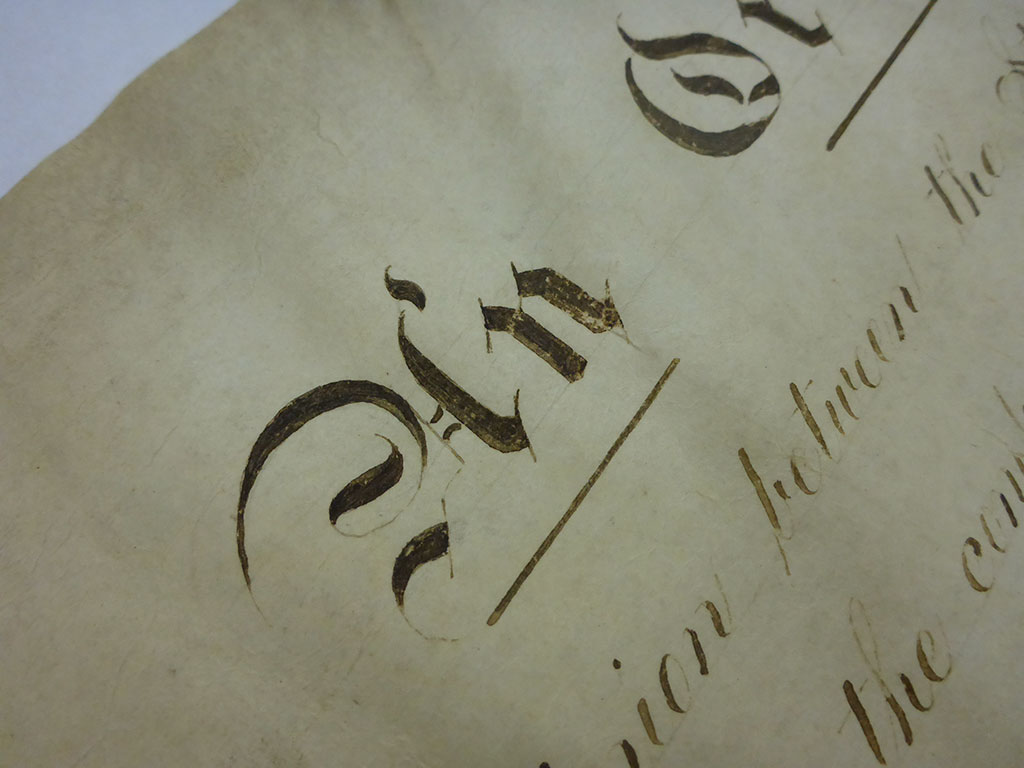
Flaking iron gall ink on the Ordinance of Secession
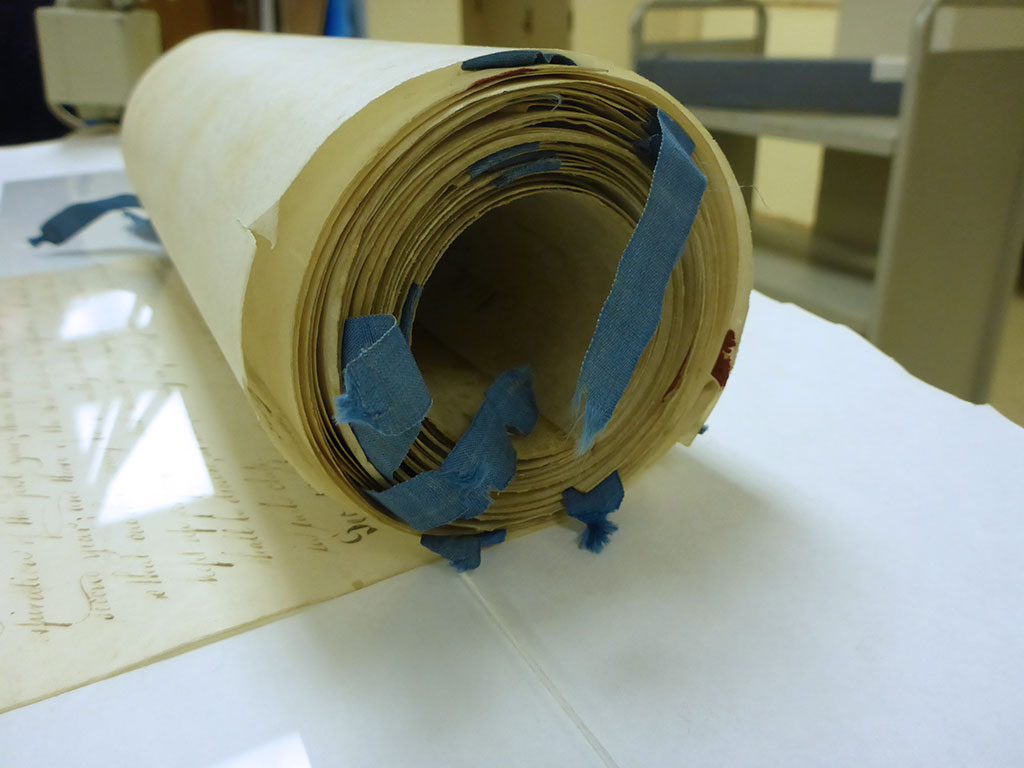
The unusually long rolled format of the Alabama documents was the most obvious thing that would affect the treatment approach. These rolled documents were comprised of good quality parchment sheets which added to their uniqueness. The exceptions to this format were the Ordinance of Secession, which was a single parchment sheet; the 1865 constitution, which was a set of ledger pages sewn together at the upper edge; and the 1901 constitution, which was a bound volume. For this story, though, the treatment focus will be on the rolled constitutions only.
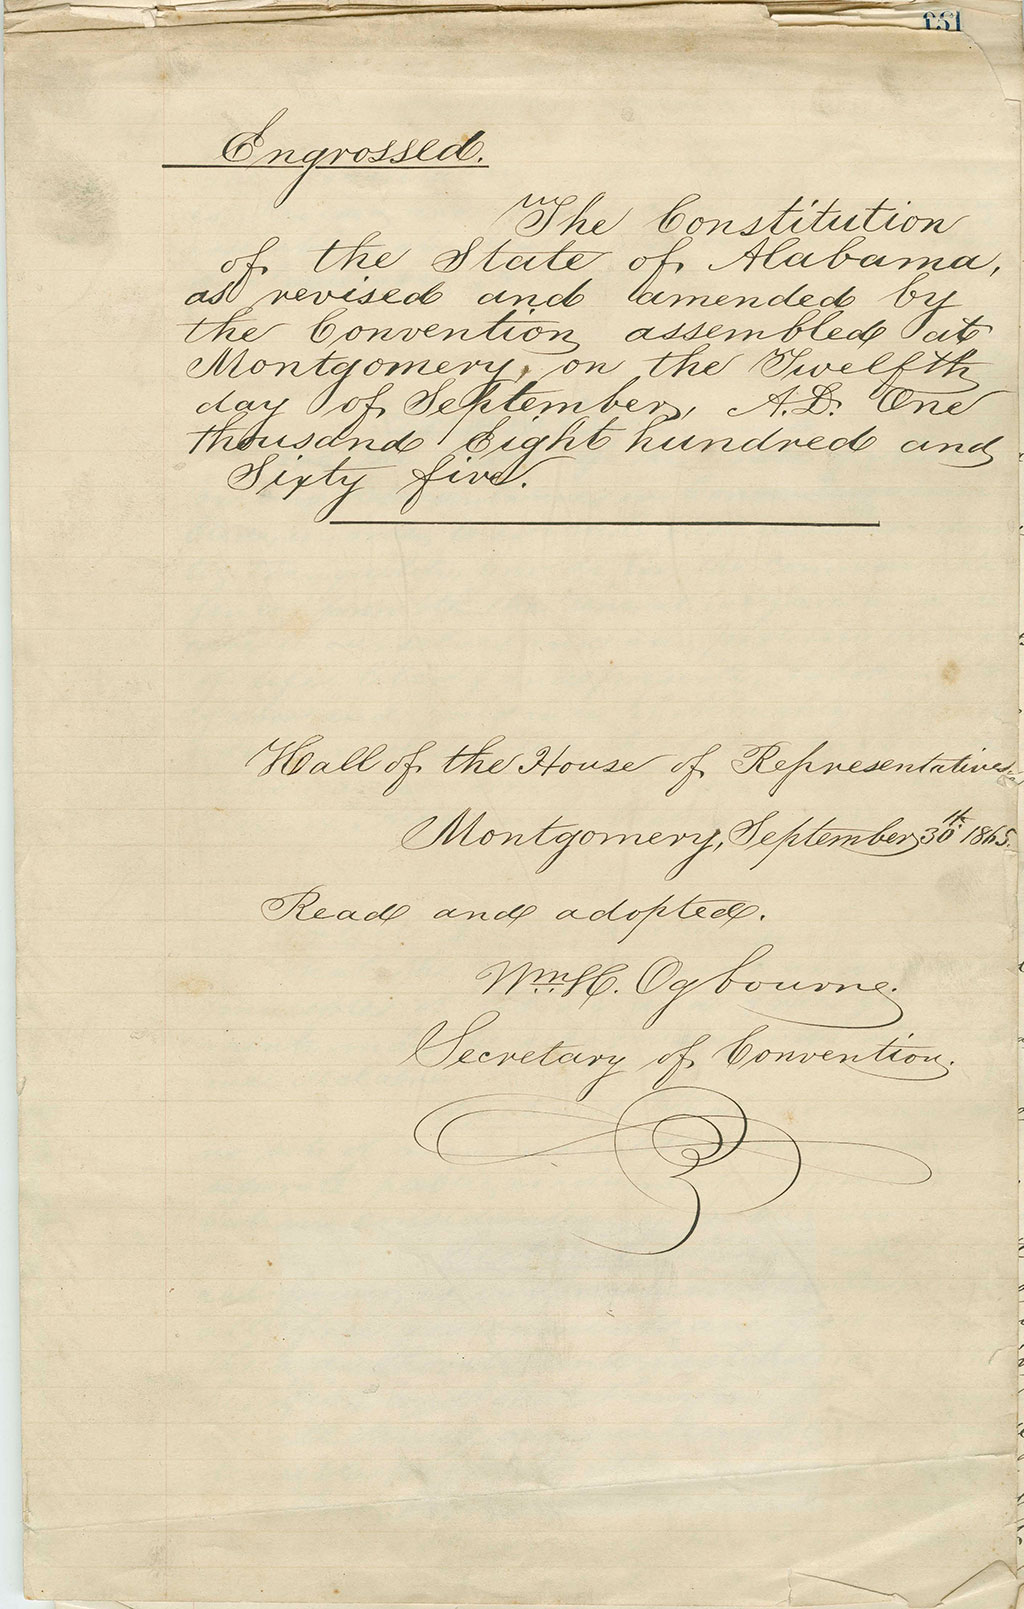
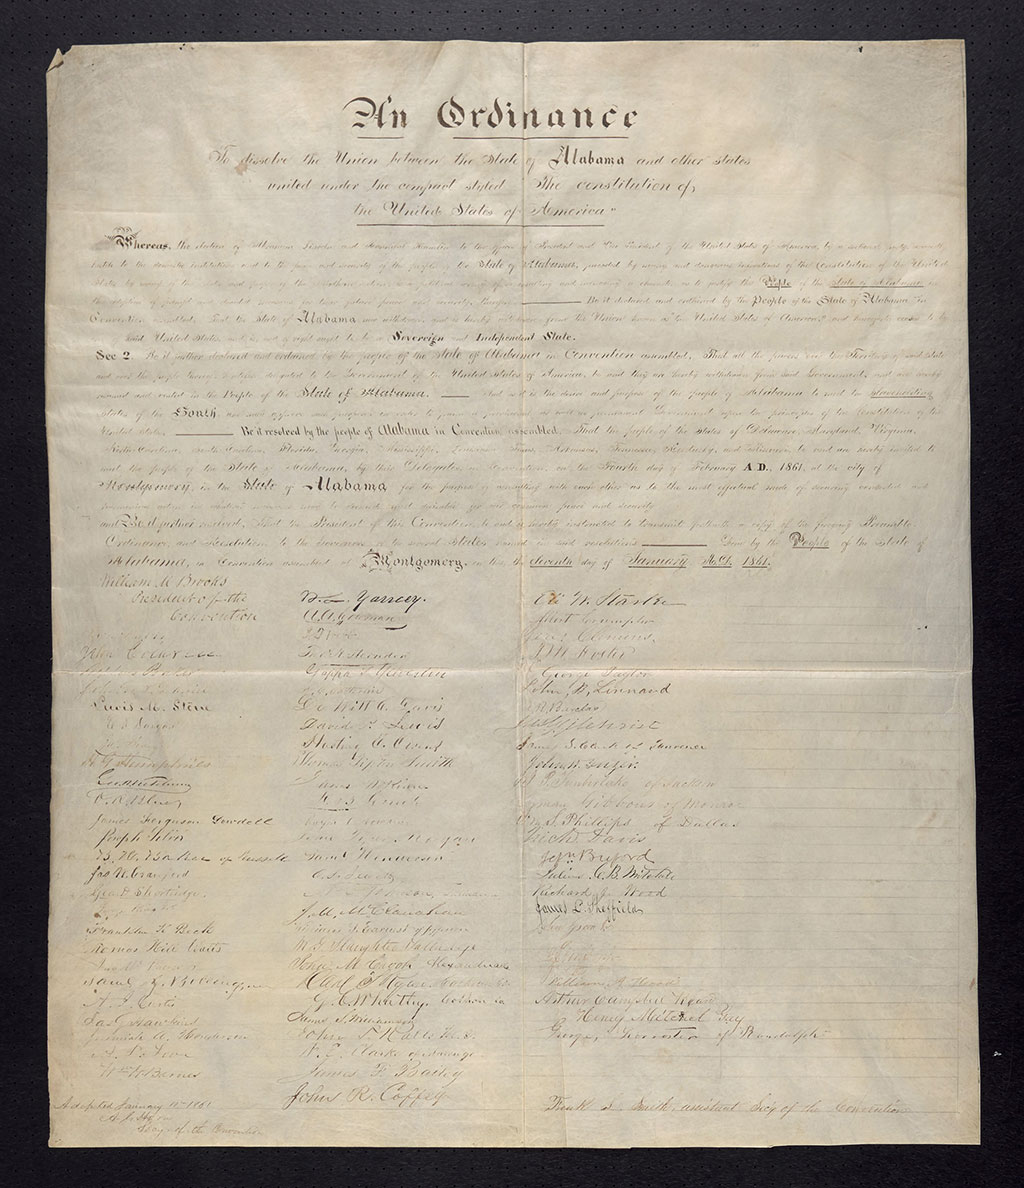
Alabama’s 1865 constitution and Ordinance of Secession
Another aspect that was immediately noted was how the parchment sheets were attached together. The 1819 constitution was held together with only ribbons, while the 1861 and 1868 constitutions were secured together with a protein-based adhesive. The 1875 constitution used a combination of the two techniques and was the document that had the most seam failures.
Adhesive seam failures on the 1875 constitution
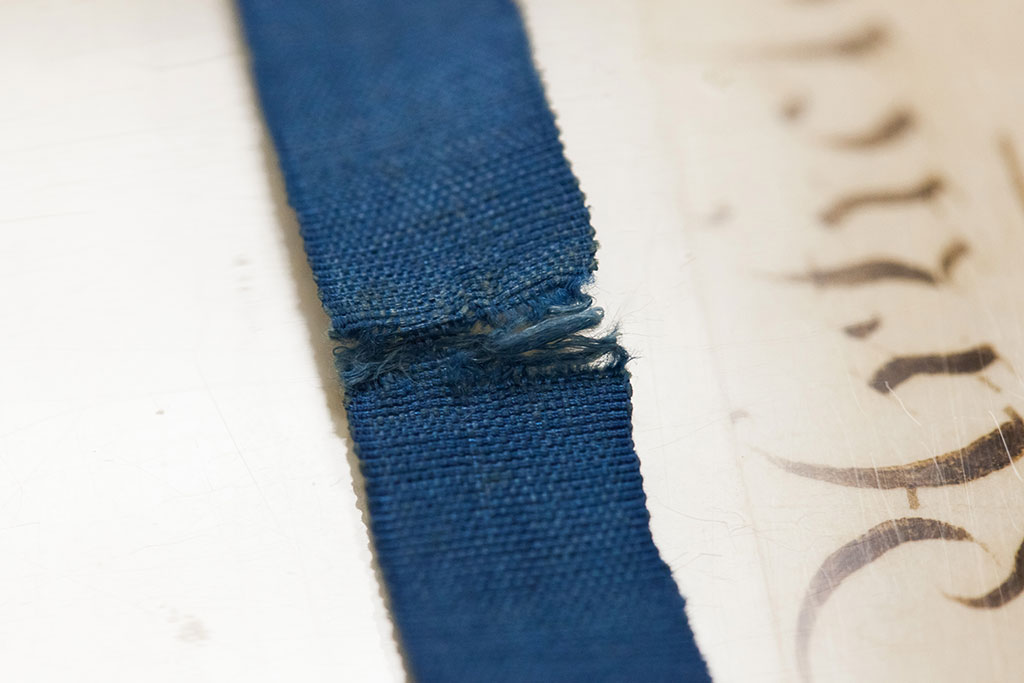
 Fraying of the 1819 constitution’s ribbons
In these two pictures, you can see why the seam failures would make handling these constitutions difficult. On the 1875 constitution, shown above, the fact that the seams were no longer adhered together meant that a lot of strain was being placed on the central security ribbon unless the sheets were weighted down. From a historical context, it also meant that the document was not working in the way its creators intended as well as being unable to be safely accessed by researchers and the public.
On the 1819 constitution, shown above, the ribbons were loose and hung off the sides. This meant that the ribbons did not control the movement of the sheets as they should and caused more abrasion to the ribbons than necessary every time it was unrolled. The ribbons also easily became entangled or damaged on the sides every time it was handled, which led to some parts of the ribbons becoming lost.
The final important aspect that the examination uncovered was that iron gall ink was used on a lot of the documents. Iron gall ink is notoriously problematic and it tends to crack so that the ink eventually flakes or becomes lost. This is a very common type of damage for parchment objects and the ink composition and thickness of application can cause more flaking.
![Materials for the creation of Iron Gall Ink: tree galls, gum arabic, white wine, and green vitriol [Iron (II) sulfate]](/assets/media/images/New_Stories/ST-AL-Story_08.jpg)
Materials for the creation of Iron Gall Ink: tree galls, gum arabic, white wine, and green vitriol [Iron (II) sulfate]
Treatment Goals
After knowing these key features of the documents, Archives staff were consulted to discuss the history of the constitutions, their goals for treatment, intended use, and overall preservation now and in the future. During this conversation, a treatment plan was created that would stabilize the constitutions and meet the Alabama Department of Archives and History’s goals.
TREATMENT OF THE ROLLED CONSTITUTIONS
The first step in any treatment project at NEDCC is documenting the objects with both photography and by taking additional detailed notes as needed. Due to the size of the constitutions, the documents were shot in sections on a specialized X/Y table in NEDCC’s Imaging Lab. The set-up is ideal for for large or fragile objects because NEDCC staff can move the table laterally in two directions to obtain an accurate visual record of the document without having to handle or manipulate the item directly.
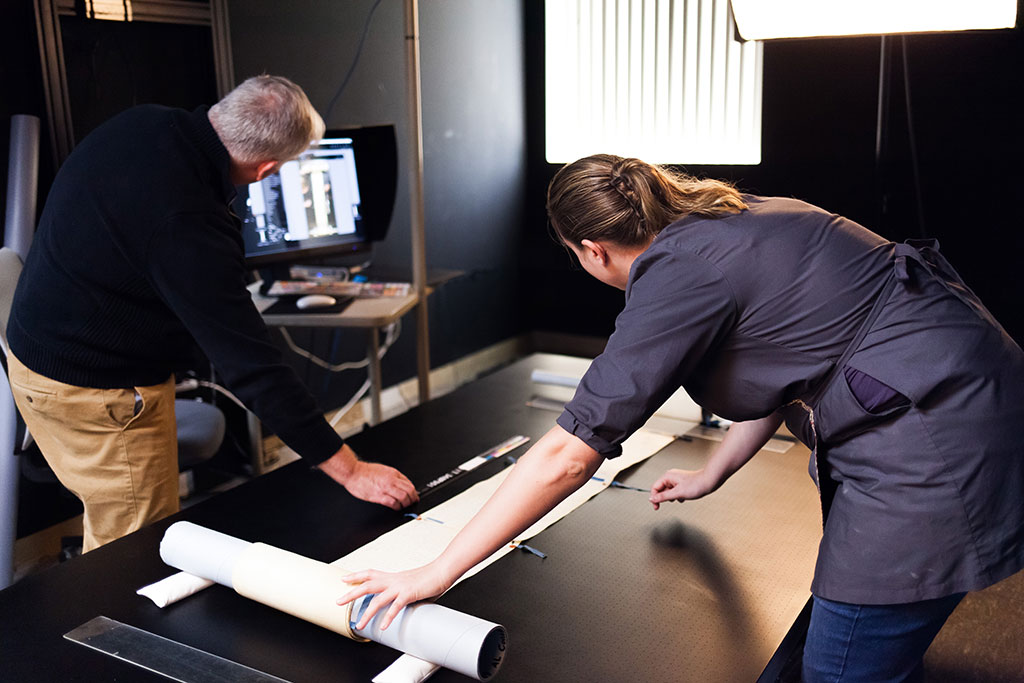
Photographing the 1819 constitution in sections
Once everything is photographed, taking extensive notes and testing the object can begin. The conservators work to secure any loose pieces temporarily during this process to make the handling easier throughout the year long project. Until the ink is stabilized, they want to work with gloves so that they don’t accidentally transfer any loose text to their skin.
Temporarily securing loose materials during examination
Those bits of cracked or loose ink are at the greatest risk for loss and must be secured to the parchment by consolidating them with gelatin before any other treatment can begin. Due to the size of the documents, it was hard to accurately estimate how much of the text was in danger of being lost. However, there were distinct patterns of damage that could be followed to ensure all flaking inks were secured.
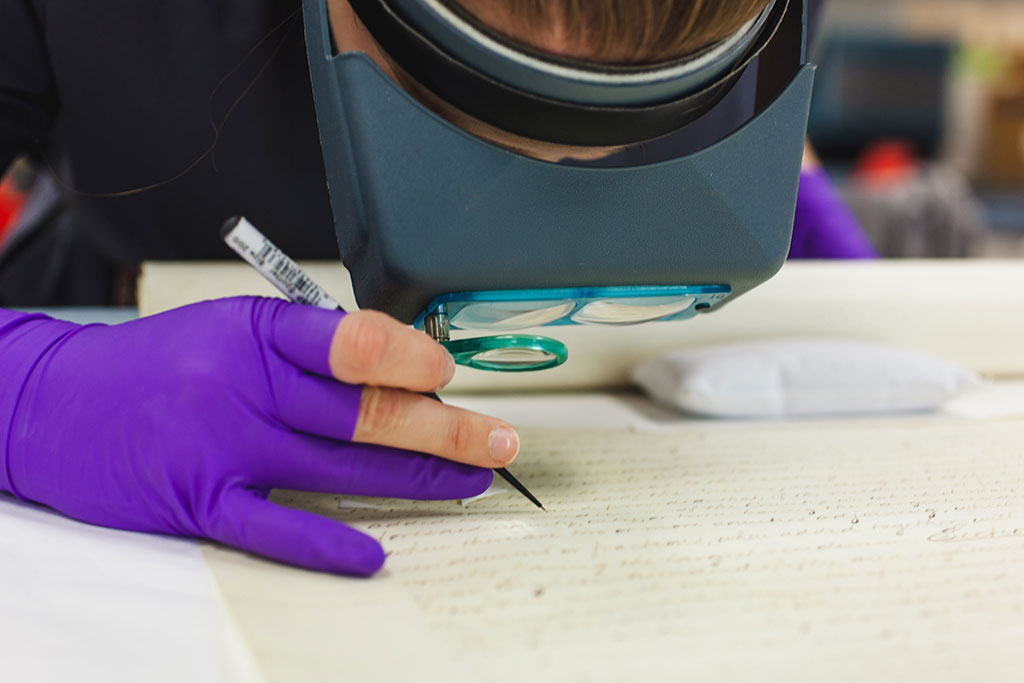 Initial examination of text with an Optivisor
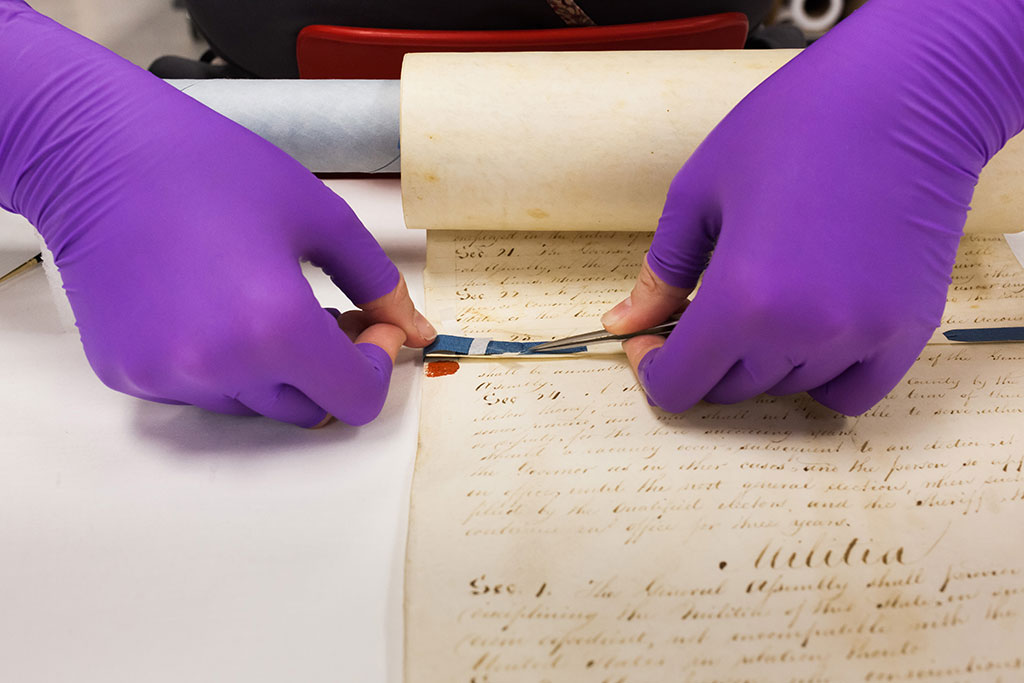
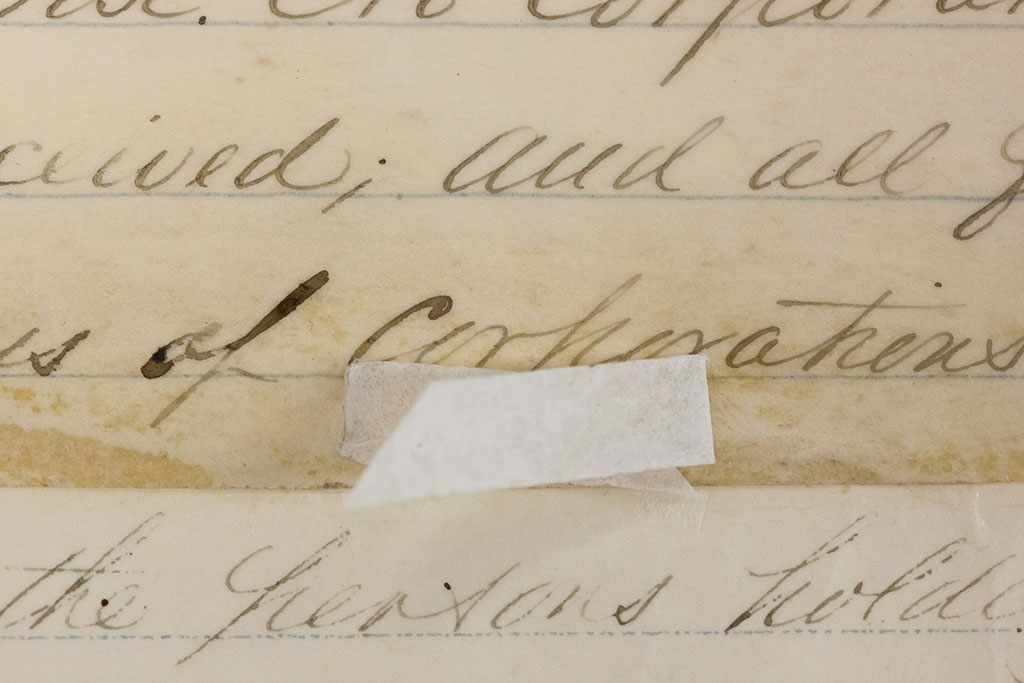
Magnified examination begins by using an Optivisor and going over each letter with a very small (000) brush in order to efficient work through the 20+ feet of text of the documents. Once problematic areas were identified, they were marked with blotter triangles that either pointed to or underlined an area that needed to be further observed under more intense magnification with a microscope at about 250x.
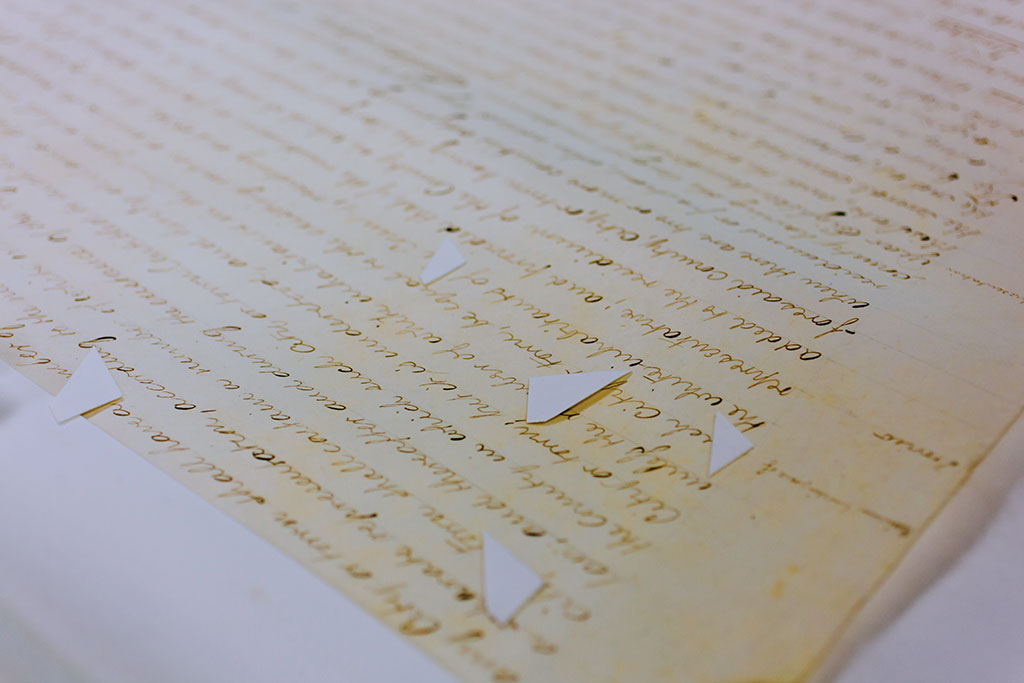
Small blotters indicating problematic areas of text
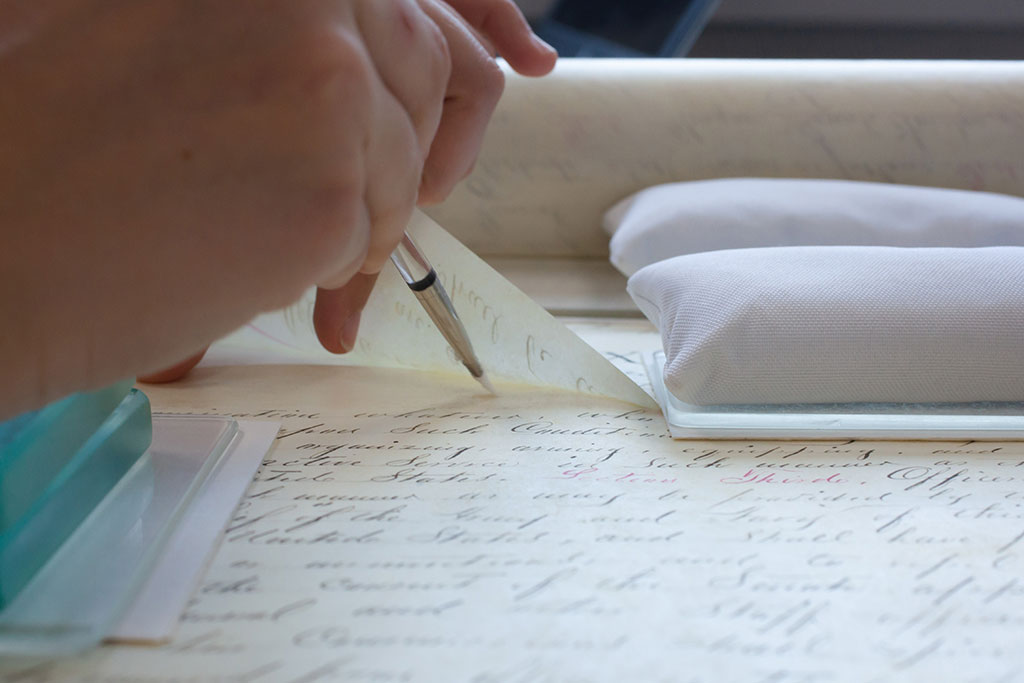
These areas are examined and tested again under the microscope with a different, but still fine dry brush. If the area was shown to indeed be cracked or flaking, a small amount of ethanol was first applied to hold the fragments in place and allow the consolidant to evenly flow throughout the damaged area. The application was then followed up with a dilute solution of conservation-grade gelatin—1% or 2% depending on how badly the text was flaking. The area was allowed to dry and then tested again. The gelatin acted as the binder for the ink where it had been lost and also very lightly adhered the ink to the parchment. Gelatin was chosen as opposed to another consolidant because it is a protein, like parchment, and it will have good flexibility to move with the parchment in the future.
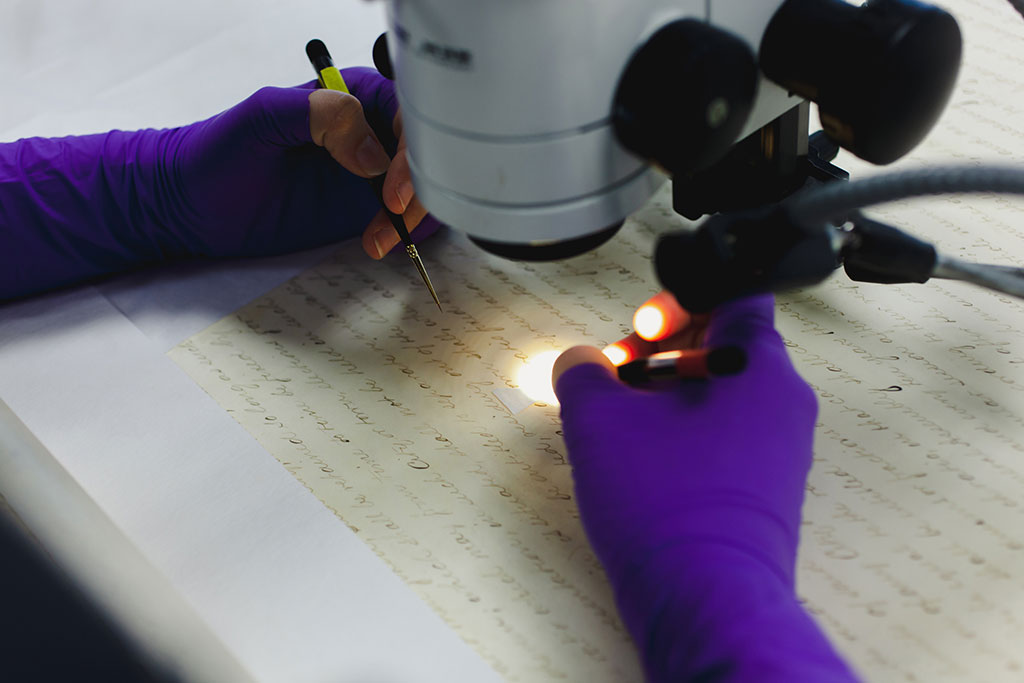
Applying gelatin under magnification
Once all of the damaged text is consolidated, any surface dirt that may be present is removed using dry cleaning techniques. Cleaning starts with a smooth goat hair brush to remove any larger pieces of debris. Additional surface cleaning is then performed using a series of fine sponges to remove any finer particulates from heavily dirtier areas.
After surface cleaning, any secondary materials that were not a part of the object originally were methodically removed. In the case of the 1868 Constitution, this meant that approximately 120 inches of tape needed to be removed. These tapes were both between two joined parchment sheets at the seams and on the verso of the object. If these tapes were left in place, the tapes would have eventually discolored the parchment and been impossible to fully remove.
Traditional tape removal methods, such as heat and solvents, cannot be utilized on parchment without potentially causing damage. The tapes were instead mechanically removed, as pictured below.
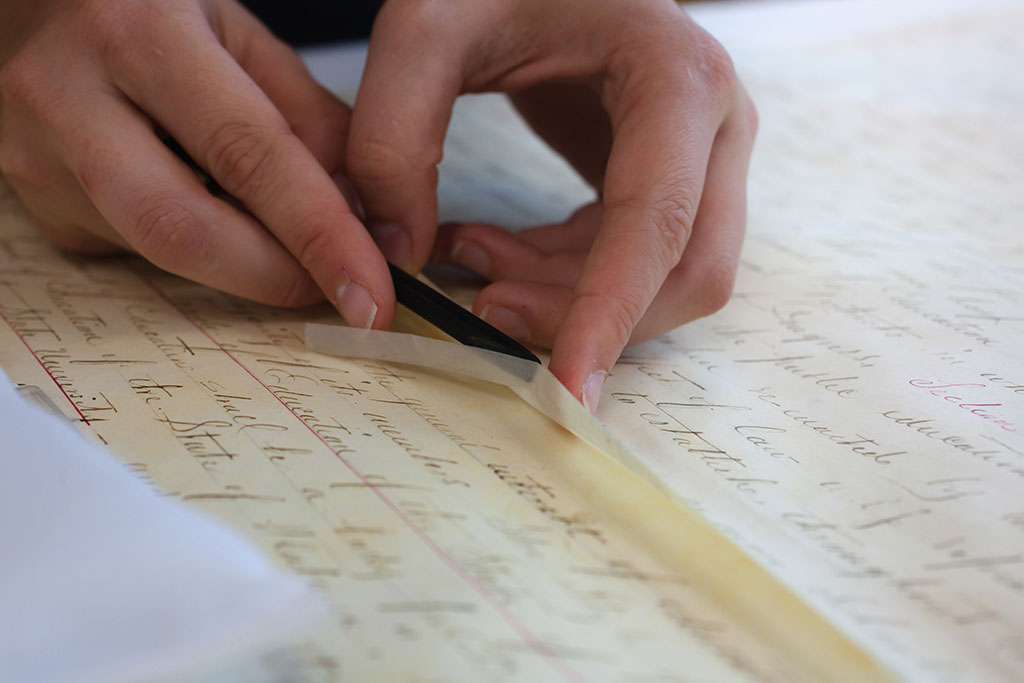
Tape removal from the seams of the 1868 constitution
The tape was first removed with a wide spatula. Any adhesive residues were then removed by careful dry swabbing. This technique was repeated until all of the tapes were removed from each object.
Testing the parchment seams from the verso
After removing the secondary materials, the attachment of the parchment sheets to one another was tested with a micro-spatula. The testing was done on both the recto and verso of the parchment. If the adhesive was failing with light pressure, the seam was separated using a teflon spatula and any old adhesive residues were gently removed mechanically.
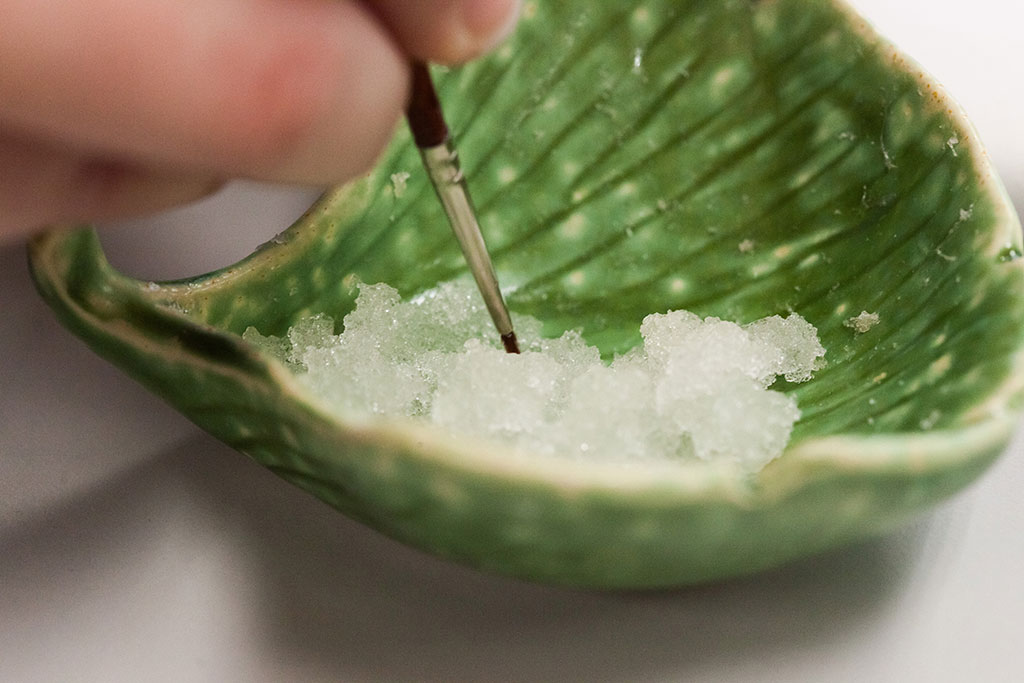
Cold, strained gelatin for use in seam stabilization and mending
An 8% conservation grade gelatin was chosen to be the seam repair adhesive for several reasons. First, much like with the text consolidation, its similarities to parchment would help it move as the parchment did. Second, at higher concentrations, it has a good tacking ability and would hold the sections together while still offering flexibility. The final reason it was chosen was because it was closest to the original adhesive used to join the object together, thus preserving some of the historical integrity.
The seams were pasted out with the cold gelatin adhesive and the sections were aligned, burnished with a Teflon spatula, and pressed under weight to dry.
Securing the seams with new adhesive

Burnishing
Pressing to dry
While reattaching the parchment sheets to each other, minor mending and reinforcement also occurred. The 1875 constitution had the most tears due to the stress on the central ribbons, so each of the ribbons was initially documented close-up and then untied to access the parchment below.
 Removing a ribbon from 1875 constitution in preparation for mending
Japanese tissue paper strips with their edges cut to constrict their effect on the parchment were pasted out with a gelatin adhesive. The mend was applied to an area of damage and burnished down to ensure it was fully attached.
Burnishing of Japanese paper repairs
The repair was dried under weight to ensure a good bond with the parchment. Once dry, the repair was trimmed down and cut if needed. On the 1875 constitution, the seams were aligned and reattached with a Hollytex spacer where the ribbons should be in the manner described above.
Close up of the 1875 constitution during seam reattachment
The silk ribbons that had been removed were flattened with a light heat and reinforced locally with a secondary silk. Each ribbon was laced back through the newly joined parchment and tied to match what it had historically looked like using the prior documentation as a reference.

Reinforcing a silk ribbon
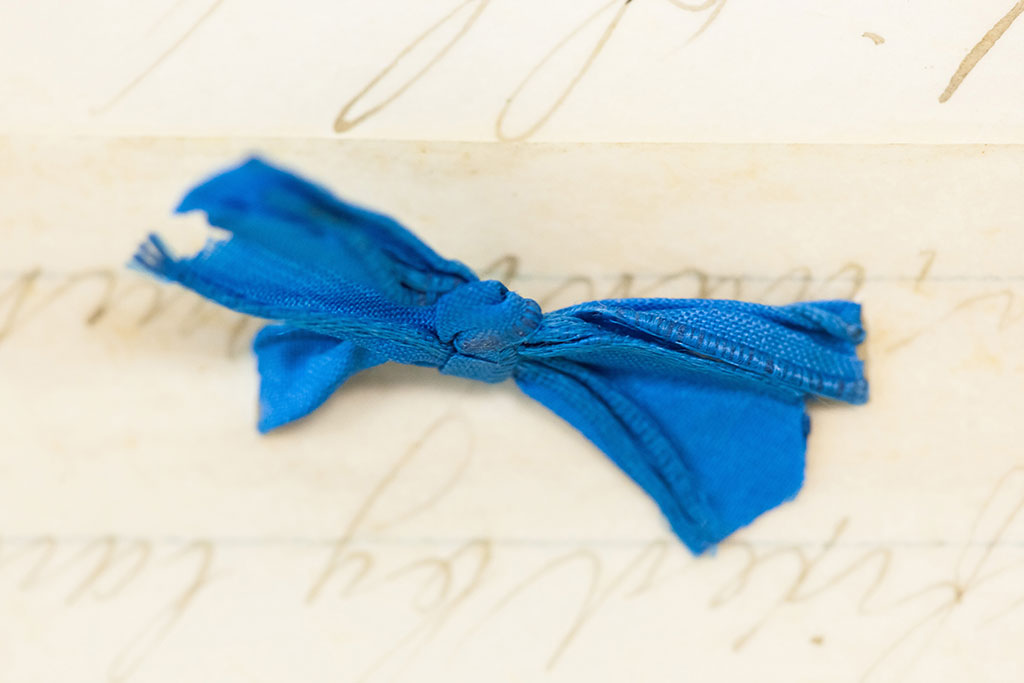
A ribbon from the 1875 constitution after repair
Ribbon Repair on the 1819 Constitution
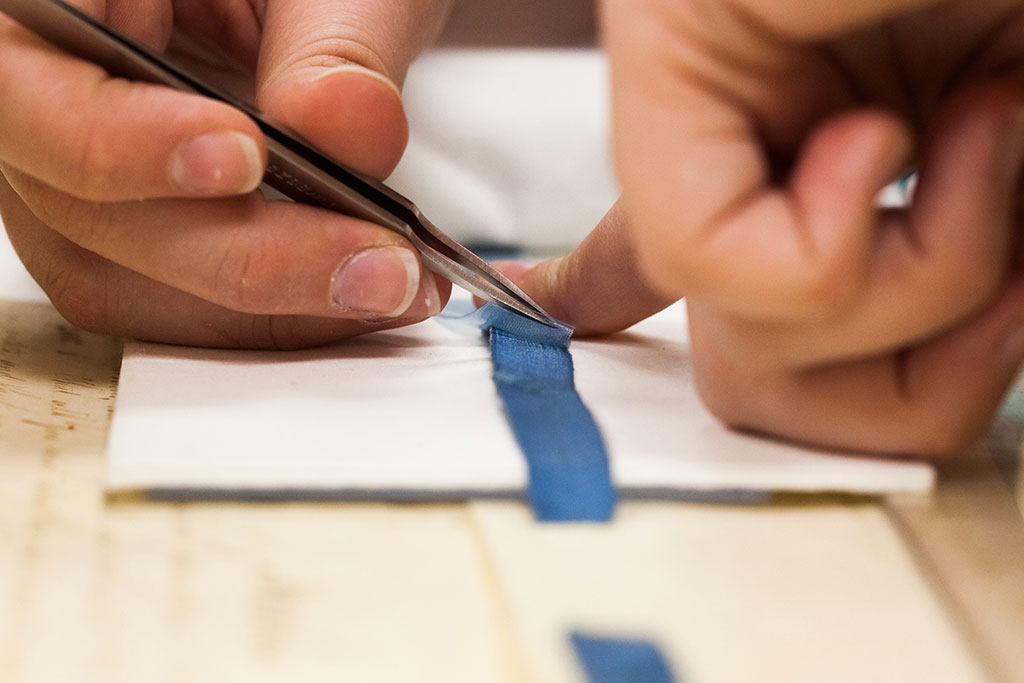
The most difficult part of the project was dealing with the ribbons on the 1819 constitution. The ribbons needed to be stabilized using a support fabric as no adhesive was used, so they were the only form of attachment. However, the ribbons were fraying in the areas where they had been slotted through the parchment. It was quickly determined that it was going to do more harm to the ribbon to remove the entire piece and then weave it back through even after stabilization. Therefore, the ribbons were repaired in-situ as much as possible.
Close-up of fraying ribbon on the 1819 constitution
Additional complications arose due to the fact that neither silk nor parchment responds well to moisture and while silk can stand a lower heat, parchment cannot. This meant that any work done needed to have multiple barriers that would absorb any heat that used between the repair and the parchment.
After much thought, a very fine silk known as Crepeline in combination with an adhesive that would adhere at a low heat was chosen for repair. Despite the additional work that would be needed to protect the parchment, this was determined to be the most reversible and safe option overall. The silk was prepared and the adhesive was applied and allowed to fully dry. In doing so, the fabric was imbued with the adhesive and when heated would adhere to the blue silk ribbons.
Applying the toned heat-set Crepeline to the ribbon
Each of the damaged areas of ribbon were measured to determine how much Crepeline was needed and to check the weave of the two fabrics against one another. This would allow for better alignment and prevent stress on the silk from the reinforcement material. The Crepeline was lightly toned to match the ribbon with Gamblin Conservation Colors.
The ribbon and silk were aligned and the Crepeline was attached with a large tacking iron on low heat. The mend was tested for flexibility and complete attachment to the original ribbon. Additional local tacking was done as needed with a smaller iron.
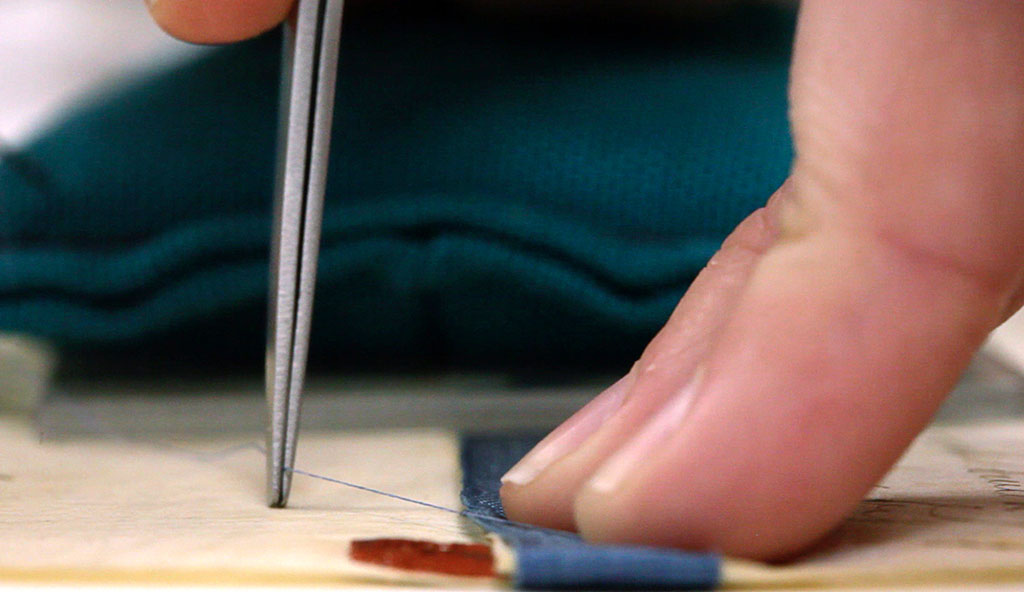
Securing the edges of the ribbon with toned hair silk
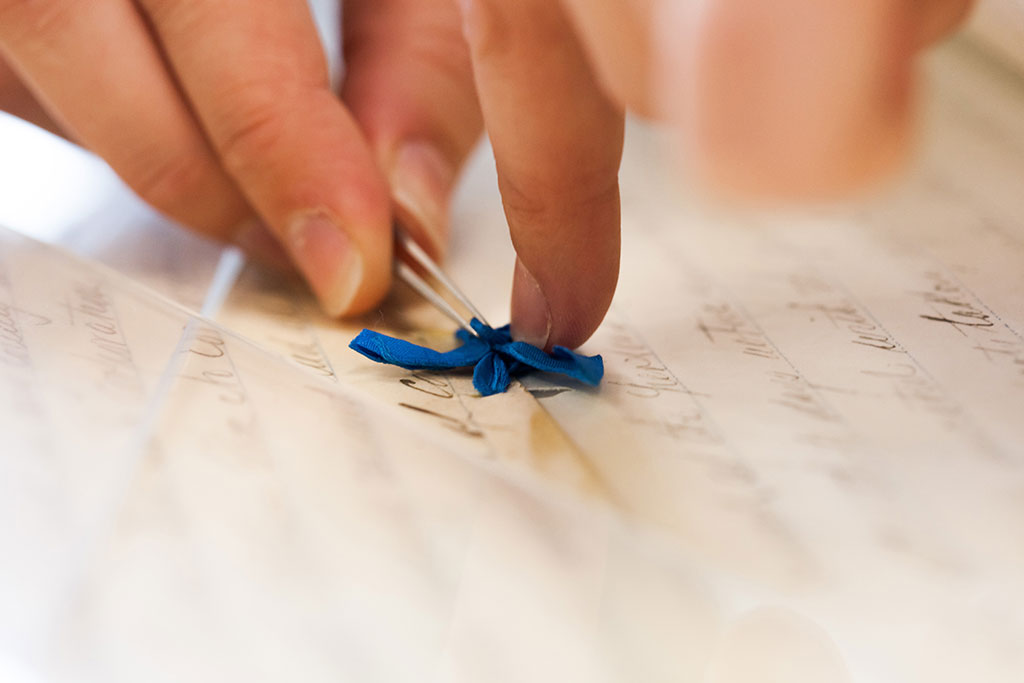
Once the ribbons were repaired, they were rewoven as needed, tightened lightly, and secured using a toned hair silk tie. The result was something that secured the loose ends in a reversible way without adding a significant amount of secondary materials. The work done also made it so that the repairs were not immediately obvious expect under close examination.
Example of the newly secured lacing on the 1819 constitution
Creation of Specialized Housings
The final step for these objects was to construct a housing that achieved the following goals: First, it had to support the object so that it was not crushed under its own weight in storage. Second, it needed to improve access and overall handling of the constitutions. And finally, it needed to be visually pleasing for the purposes of the We the People exhibition as the constitutions would remain on the support tubes during the exhibition.
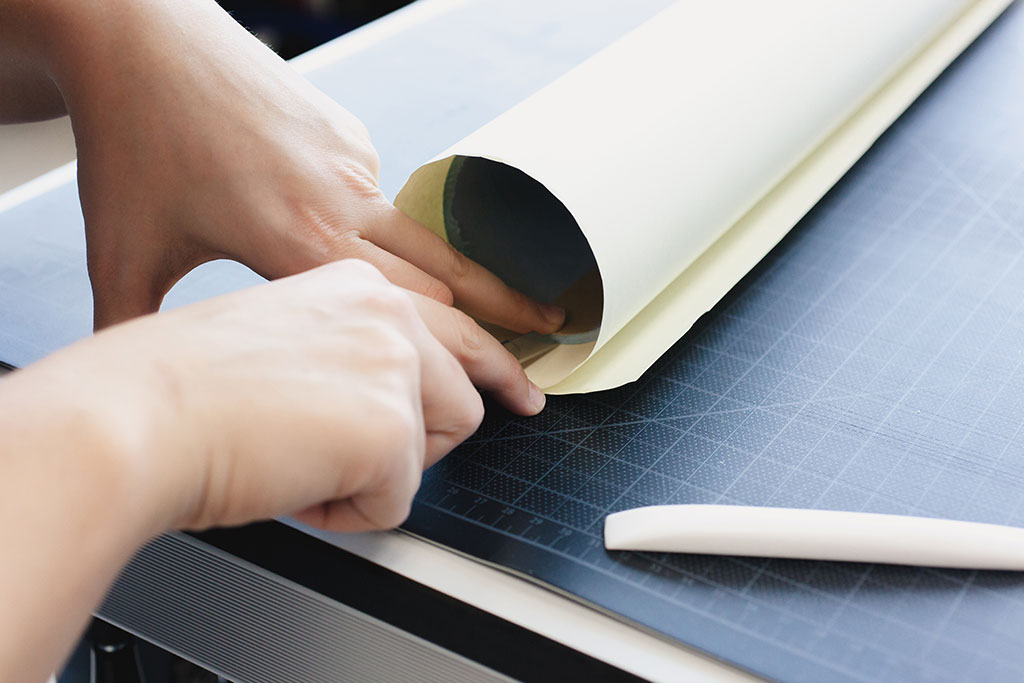
Wrapping archival tube in a neutral toned paper
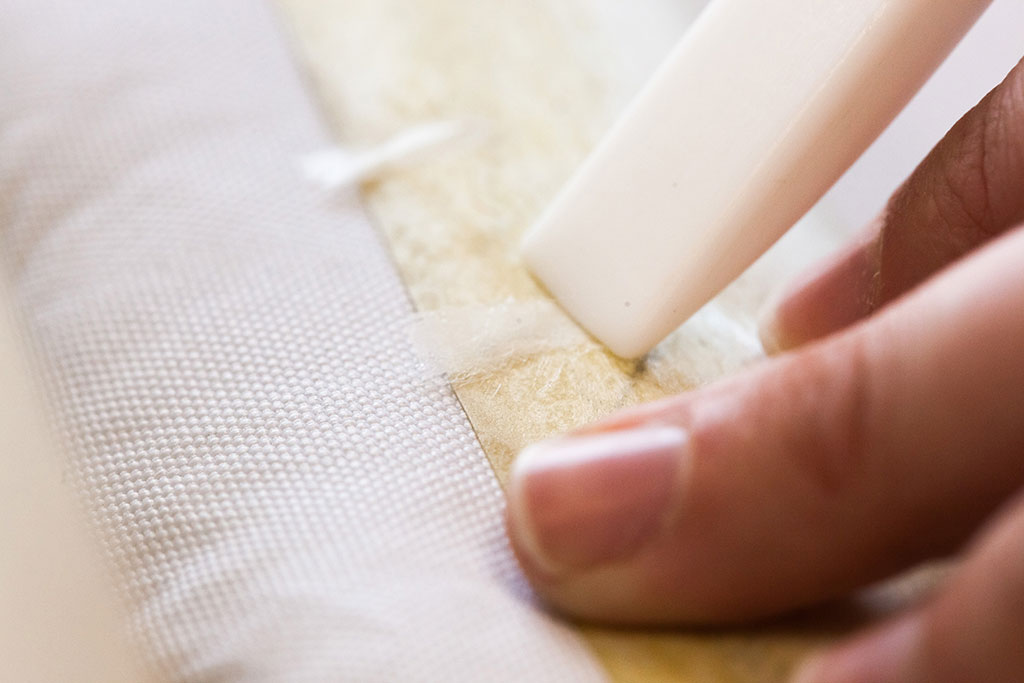
First, an archival tube was cut to be slightly larger than the constitutions and covered in neutral paper tone. The edges of the paper at the ends of the tube were fringed, folded inward, and burnished before being permanently attached to the interior of the tube.
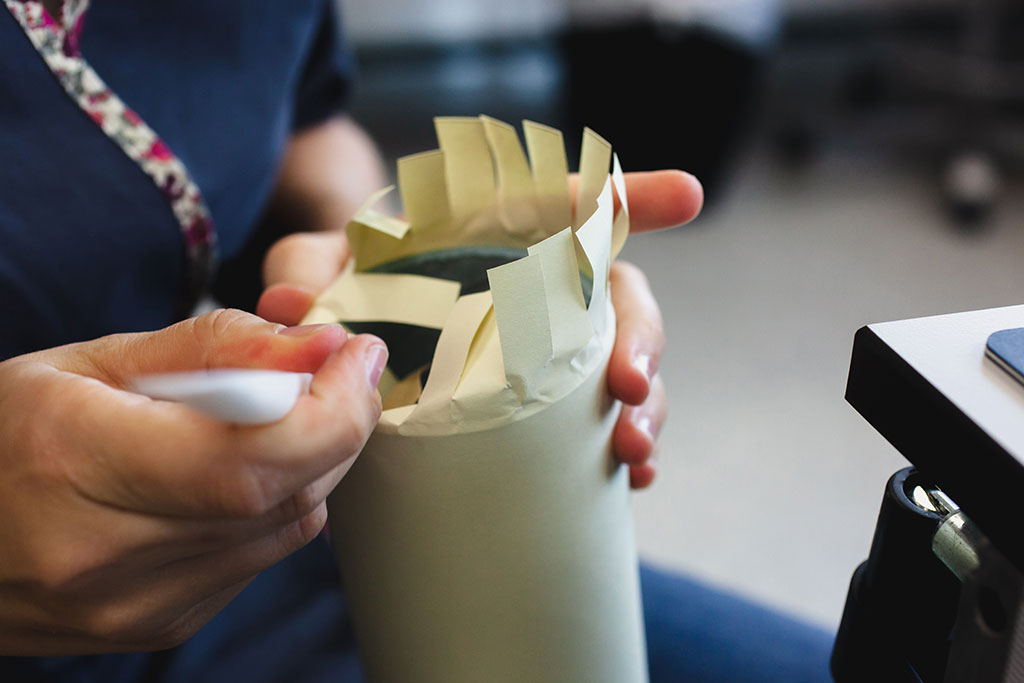
Feathering and wrapping the edges of the archival tube
A second piece of the neutral paper was cut to fit the interior of the tube and attached with a conservation grade adhesive around the edges. Like the exterior paper, it too was burnished and allowed to dry.
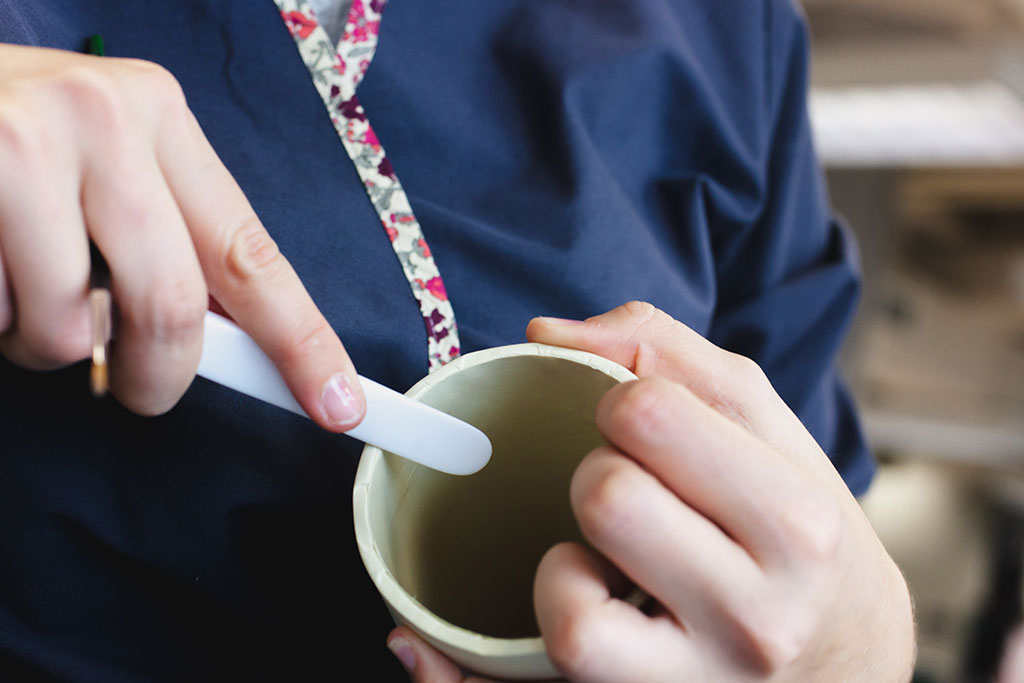
Burnishing the interior paper wrapping
For the best protection of a rolled object, it is recommended that they are suspended in the boxes on tubes larger than the object. However, as the constitutions’ tubes would be used in the exhibition, they needed to be close in width to that of the documents. This required that additional interior furniture be constructed to pad out the permanent housing in order to accommodate the exhibition.
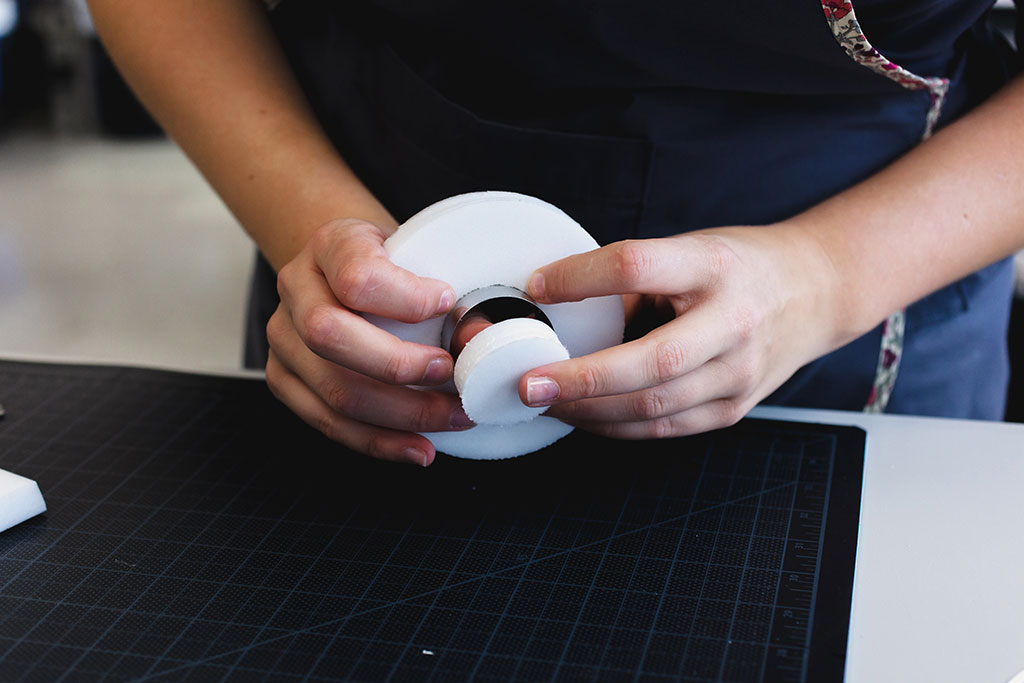
Cutting Volara spacers and support pieces
Volara spacer supports were cut with a void in the center to act as a buffer and allow a suspension tube to be secured inside.
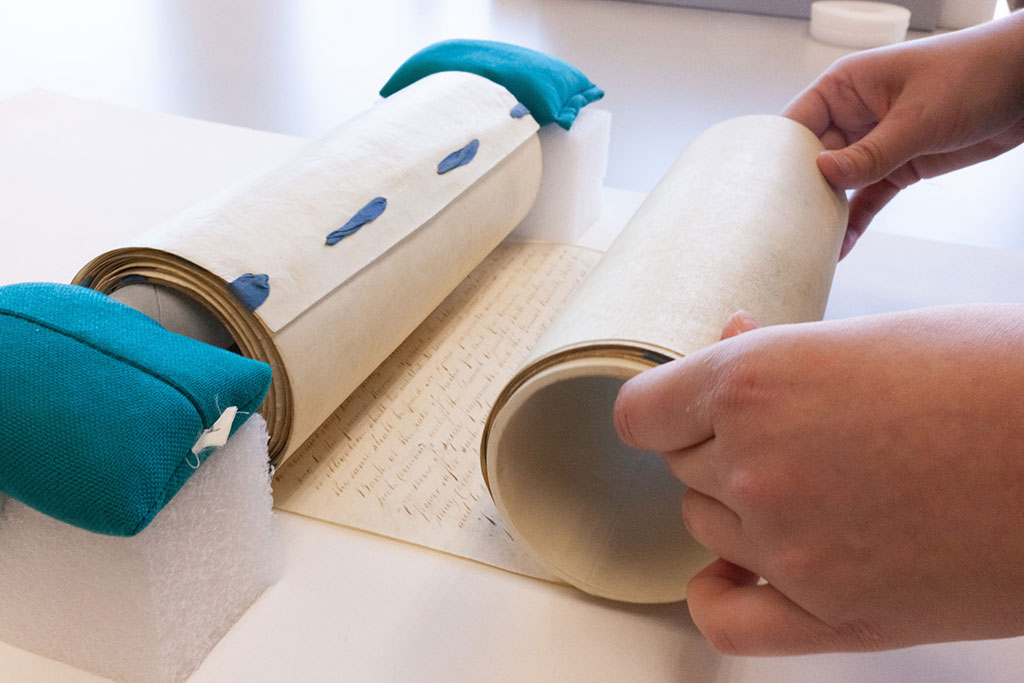
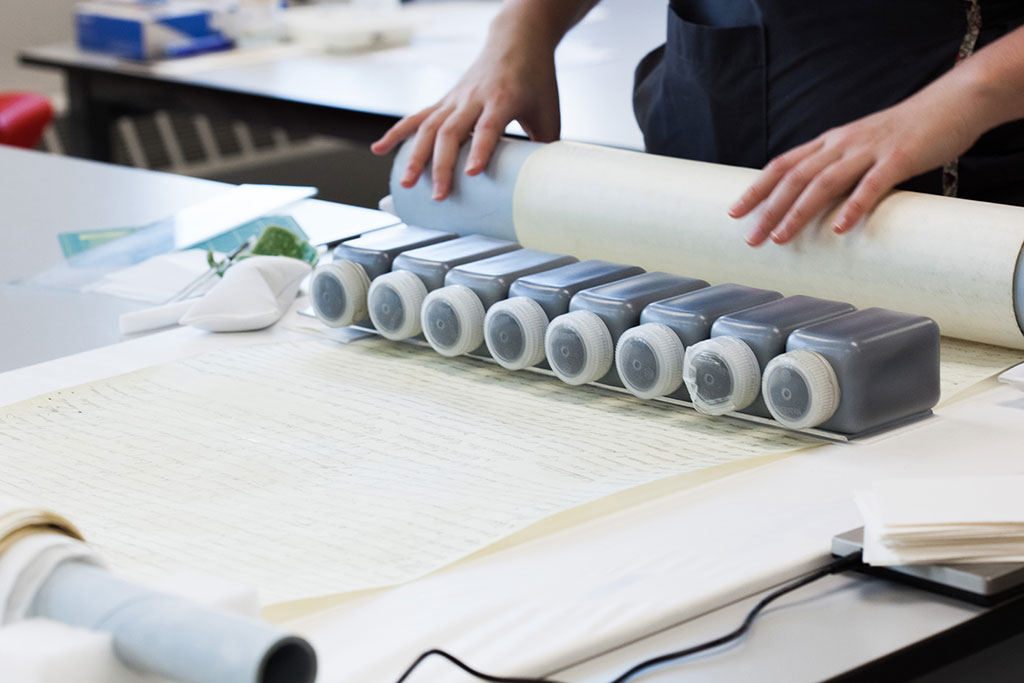
Rolling the 1819 constitution onto its new archival tube
The constitutions were then carefully rolled onto their prepared tubes to ensure proper alignment of the object before confirming that the Volara supports ensured the constitution didn’t touch the sides of the box or other interior furniture.
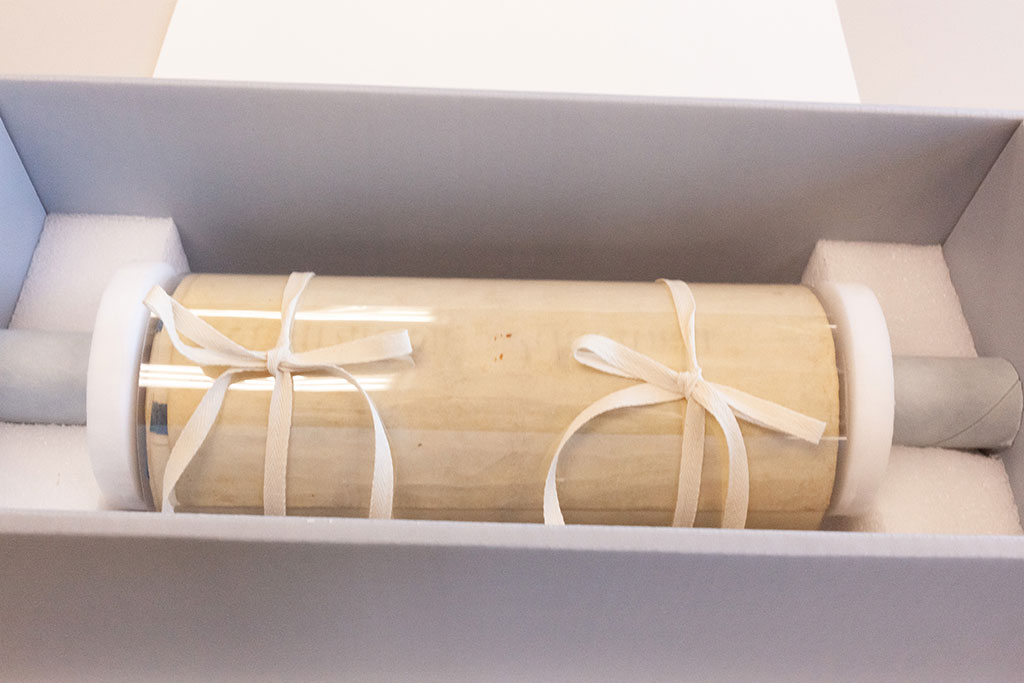
1819 constitution in its custom housing
The constitutions were covered with a polyester wrapper to prevent it from unravelling and the document, along with all the supports were fit into their respective boxes for return to the Alabama Department of Archives and History and the We the People: Alabama’s Defining Documents exhibitions.
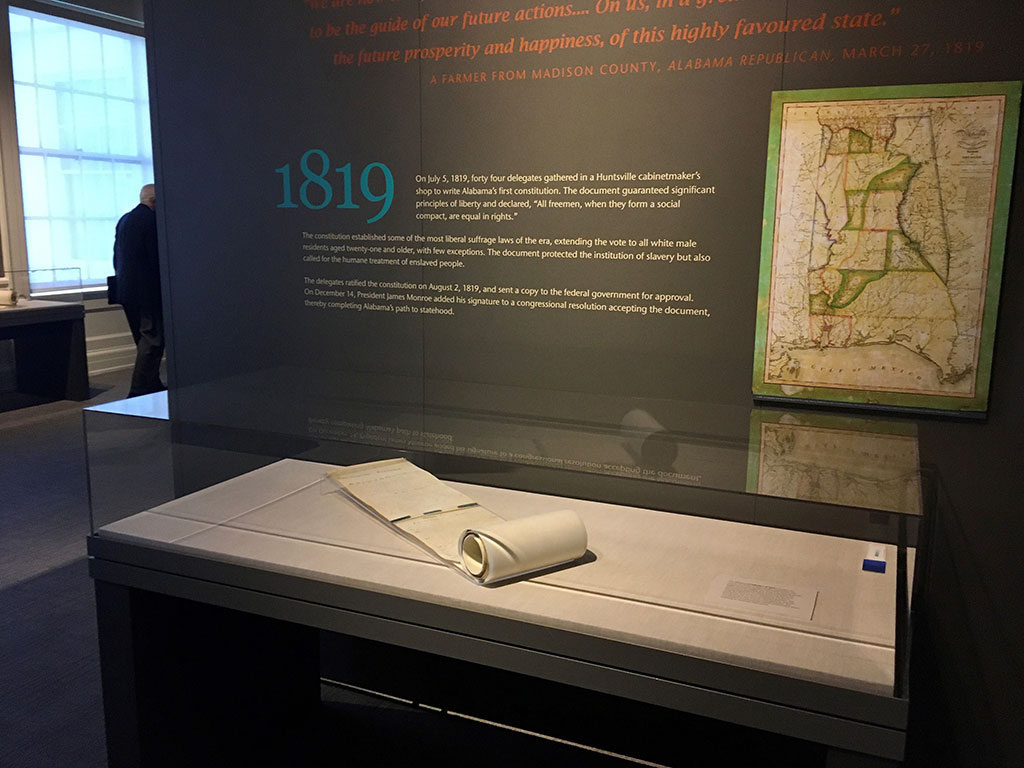
The 1819 constitution on display at the Alabama Department of Archives and History
We the People: Alabama's Defining Documents
The Constitutions are on display at the Alabama Department of Archives and History in Montgomery until December 31, 2019. Additional information regarding the exhibition can be found online at the Archive’s website, We the People: Alabama’s Defining Documents.
Visit the Alabama Archives on Twitter, Instagram, and Facebook at @AlabamaArchives and follow news about the bicentennial specifically with the tags: #PathToStatehood #AlabamaHistory and #Alabama200.
Story Notes
The treating conservators on this project were Katie Boodle and Todd Pattison, with consolidation assistance from Terra Huber. Specialized housings were constructed by Katie Boodle and Emily Schuchart. Collections Photographers David Joyall and Tim Gurczak assisted with the photographic documentation and filming that was used throughout this article and by the Alabama Department of Archives and History in their exhibition.
Story by Katie Boodle, NEDCC Associate Paper Conservator
2019